- File size:
- 592 MB
- Date added:
- Mar 21, 2024 | Last update check: 1 minute ago
- Licence:
- Trial | Buy Now
- Runs on:
- Windows 10 64-bit / 11
Rhino is the 3D-modeling software used for mathematically precise modeling of products ranging from jewelry and furniture to architecture. Rhino is accurate as CAD, and useful when you create model for visualization and presentation, but not just for production or simulation.
Rhino is not intended for video industry and effects where high precision is not required. Rhino gives emphasis to model’s precision and therefore uses NURBS technique. NURBS (Non-Uniform Rational B-Spline) is based on the definition of 3D surfaces with mathematical formulas (splines). The working principle in Rhino is somewhat different from most 3D packages and more like a CAD program.
There are three fundamental entities that comprise the Rhino – the Curve, the Surface and the Solid. Technically there is the fourth entity – the Point entity, but it doesn’t really count, since it’s not used for modeling, but mostly as a reference, or a marker.
Licensing. One notable aspect of Rhino is its accessibility in terms of licensing. You can use Rhino free for 90 days. After 90 days, Rhino will not save. Expired evaluations are great for learning Rhino or viewing Rhino and other file formats. Rhino offers perpetual licenses, allowing users to purchase a license for a specific version of the software and use it indefinitely without the need for annual renewals.
Advantages. Rhino is a highly versatile tool, excelling in both free-form (organic) and precision-based modeling with its NURBS-based system. While SketchUp is known for its ease of use, Rhino provides more advanced modeling capabilities. When compared to SolidWorks and CATIA, which are parametric modeling tools specialized in engineering and manufacturing, Rhino proves suitable for a broader range of design disciplines. In contrast to Blender‘s emphasis on artistic design primarily through polygonal or mesh modeling, Rhino’s NURBS modeling is particularly advantageous for projects requiring high geometric precision. Additionally, Rhino’s compatibility with various plugins and seamless integration into other industry-standard software makes it an ideal tool for those seeking a comprehensive and collaborative approach.
BIM workflow. Rhino can be incorporated into a BIM workflow, and is often used in conjunction with BIM software. While Rhino plays a valuable role in the early stages of design and conceptualization, it’s common for design teams to transition to dedicated BIM software as the project progresses, for tasks related to BIM authoring, documentation, coordination, collaboration, and data management.
Rhino.Inside. Rhino.Inside is an open-source project which allows Rhino and Grasshopper to run as a plugin within other applications, effectively integrating Rhino’s powerful 3D modeling capabilities into those host environments. It has been notably used in the context of integrating Rhino into Autodesk Revit. This allows architects and designers to seamlessly work with Rhino and Revit simultaneously, bringing the strengths of Rhino’s NURBS-based modeling into the Revit environment.
Grasshopper. Grasshopper is an integral part of Rhino and a node-based graphical algorithm editor for generative parametric modeling of architectural form without any knowledge of programming and scripting. Grasshopper is a visual programming language created by David Rutten (at Robert McNeel & Associates), a computer scientist and architect, who wanted to write a visual scripting interface that would tell Rhino what to do. The first version was released in 2007 as a plugin for Rhino. Starting with Rhino 6, Grasshopper is automatically installed when you install Rhino.
Typical workflow
Follow these steps to progress from the basics to advanced techniques, gaining a comprehensive understanding of Rhino.
- Download and install: Download and install Rhino on your computer. Take into account that the evaluation version is downloaded separately from the version that requires a license key.
- Get familiar with UI: Open Rhino and familiarize yourself with the interface components, including viewports, command line, and toolbars. Customize the Rhino workspace according to your preferences. Familiarize yourself with the following concepts:
- NURBS: Rhino’s underlying mathematical representation for creating curves and surfaces, allowing for precise and flexible modeling.
- Grasshopper: A built-in visual programming language plugin for Rhino for creating parametric designs.
- Command line: A tool for executing commands directly instead of using toolbars.
- Viewports: Separate windows displaying different views of the 3D model.
- Editing tools: Fundamental tools for modifying objects, including Move, Rotate, and Scale.
- Layers: Helps you organize your model by grouping similar objects together.
- Surface modeling: The process of creating and manipulating surfaces to build 3D objects.
- Boolean operations: Operations for combining or subtracting geometric shapes.
- Blocks: Reusable components that you can create and insert into your model.
- Modeling: Create solids and surfaces, and practice editing and transforming 3D objects.
- Basic navigations: Learn how to navigate in the 3D space using mouse controls or keyboard shortcuts for orbiting, panning, and zooming.
- Basic commands: Use the command line or toolbar to execute basic commands like Line, Circle, Rectangle, Curve, and Surface.
- Basic editing tools: Explore basic editing tools such as Move, Rotate, and Scale to modify objects in your model.
- 2D geometry: Learn how to draw and edit 2D shapes. Explore curve creation tools and practice precision drawing techniques.
- 3D objects: Experiment with 3D primitive shapes and use the Extrude command to turn 2D shapes into 3D objects.
- Surface modeling: Dive into surface modeling techniques, creating and manipulating surfaces to build your designs.
- Advanced modeling: Explore advanced modeling with scripting, plugins, Boolean operations, and surface editing for complex 3D shapes.
- Introduction to Grasshopper: Familiarize yourself with Grasshopper, the parametric modeling tool. Understand its interface and basic functionalities.
- Workflow optimization: Streamline your modeling processes for efficiency. Use shortcuts, scripting, and collaborative work tips to enhance productivity.
- Organizing and grouping: Use layers to organize your model and group objects together for easier manipulation.
- Rendering and visualization: Explore rendering capabilities by applying materials, textures, setting up scenes, lighting, and configuring settings for realistic rendering.
- Exporting/Importing files: Learn to export Rhino models into various file formats and import files from other software into Rhino.
- Practice and experiment: Practice regularly and experiment with your own designs. Apply the new knowledge to create unique and complex 3D models.
- Real-world case studies: Study real-world case studies, gaining insights into how professionals use Rhino in architectural and design projects.
- Community engagement: Engage with the Rhino community, online forums, and resources for additional support and to stay updated on the latest developments.
What’s new in Rhino 8:
Rhino 8 features new Shrink Wrap function, PushPull command, and enhnaced Gumball.
- ShrinkWrap command. Create watertight mesh that follows your initial geometry. Easily create meshes for 3D printing, and meshes from point clouds.
- PushPull command. Extrude/intrude surfaces like you can do in SketchUp.
- Improved Gumball. Use the Gumball as a direct modeling tool, extrude solids and cut through objects.
- Dark Mode. New dark theme to reduce eye strain.
- New display mode: Monochrome. Display nice soft shadows in your model, ideal for architectural visualizations.
- Reflected Ceiling Plan. New “Parallel Reflected” projection option in Properties, to show ceiling features.
- Section Styles. New “Section Style” set of options in Properties. You can choose between “By Layer”, “By Parent”, “By Clipping Plane”, or “Custom”. Control section style for layers so clipping planes can create section views and drawings.
- SubDCrease command. Create better transition between no creases and full creases along an edge.
- Auto CPlanes. Automatically align construction planes to a geometry.
- Selective Clipping tool. Exclude layers from the clipping when you create a clipping plane.
- Dynamic 2D drawings. Create live sections – vector drawings that update with model changes.
- Clipped views. Clip parts of your model.
- Improved Inset command. Offset edges inward on curved surfaces. You can do offset across edge seams.
Gallery
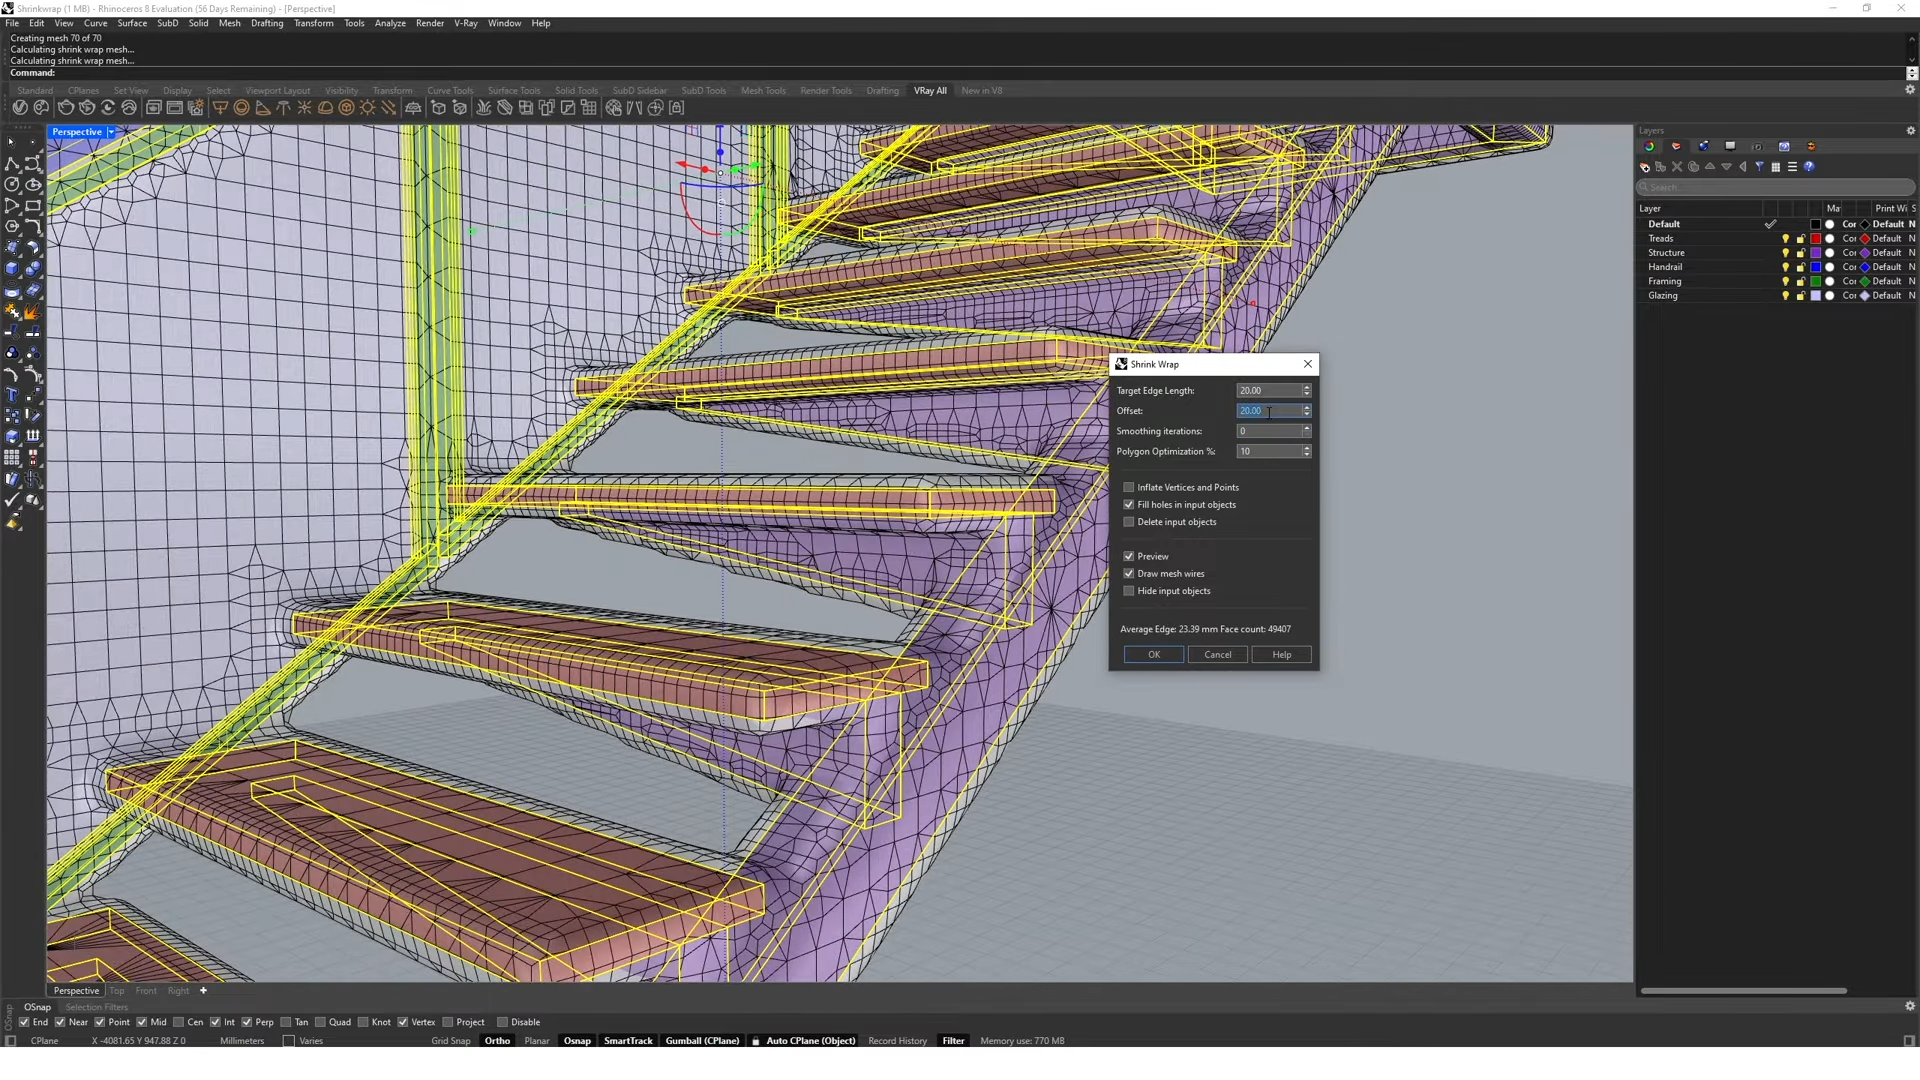
Shrink Wrap. ©The Different Design
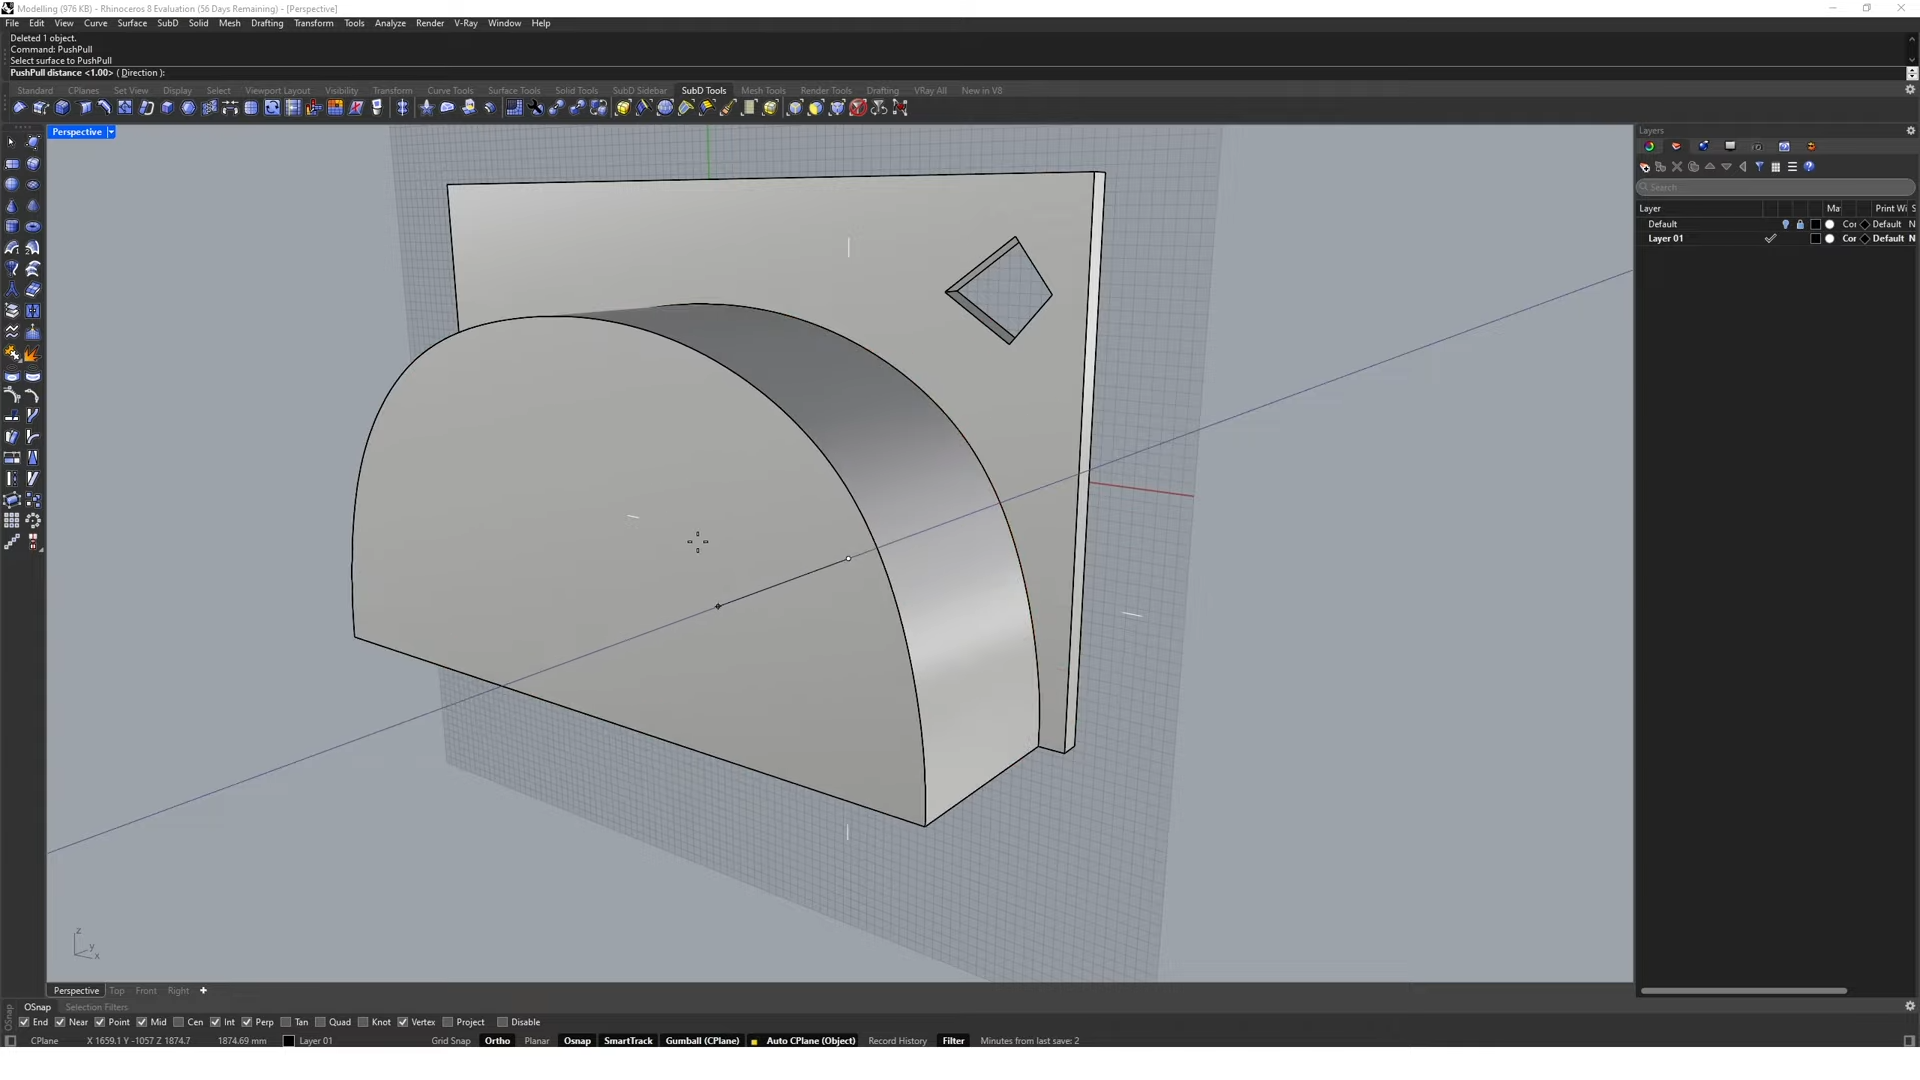
PushPull. ©The Different Design
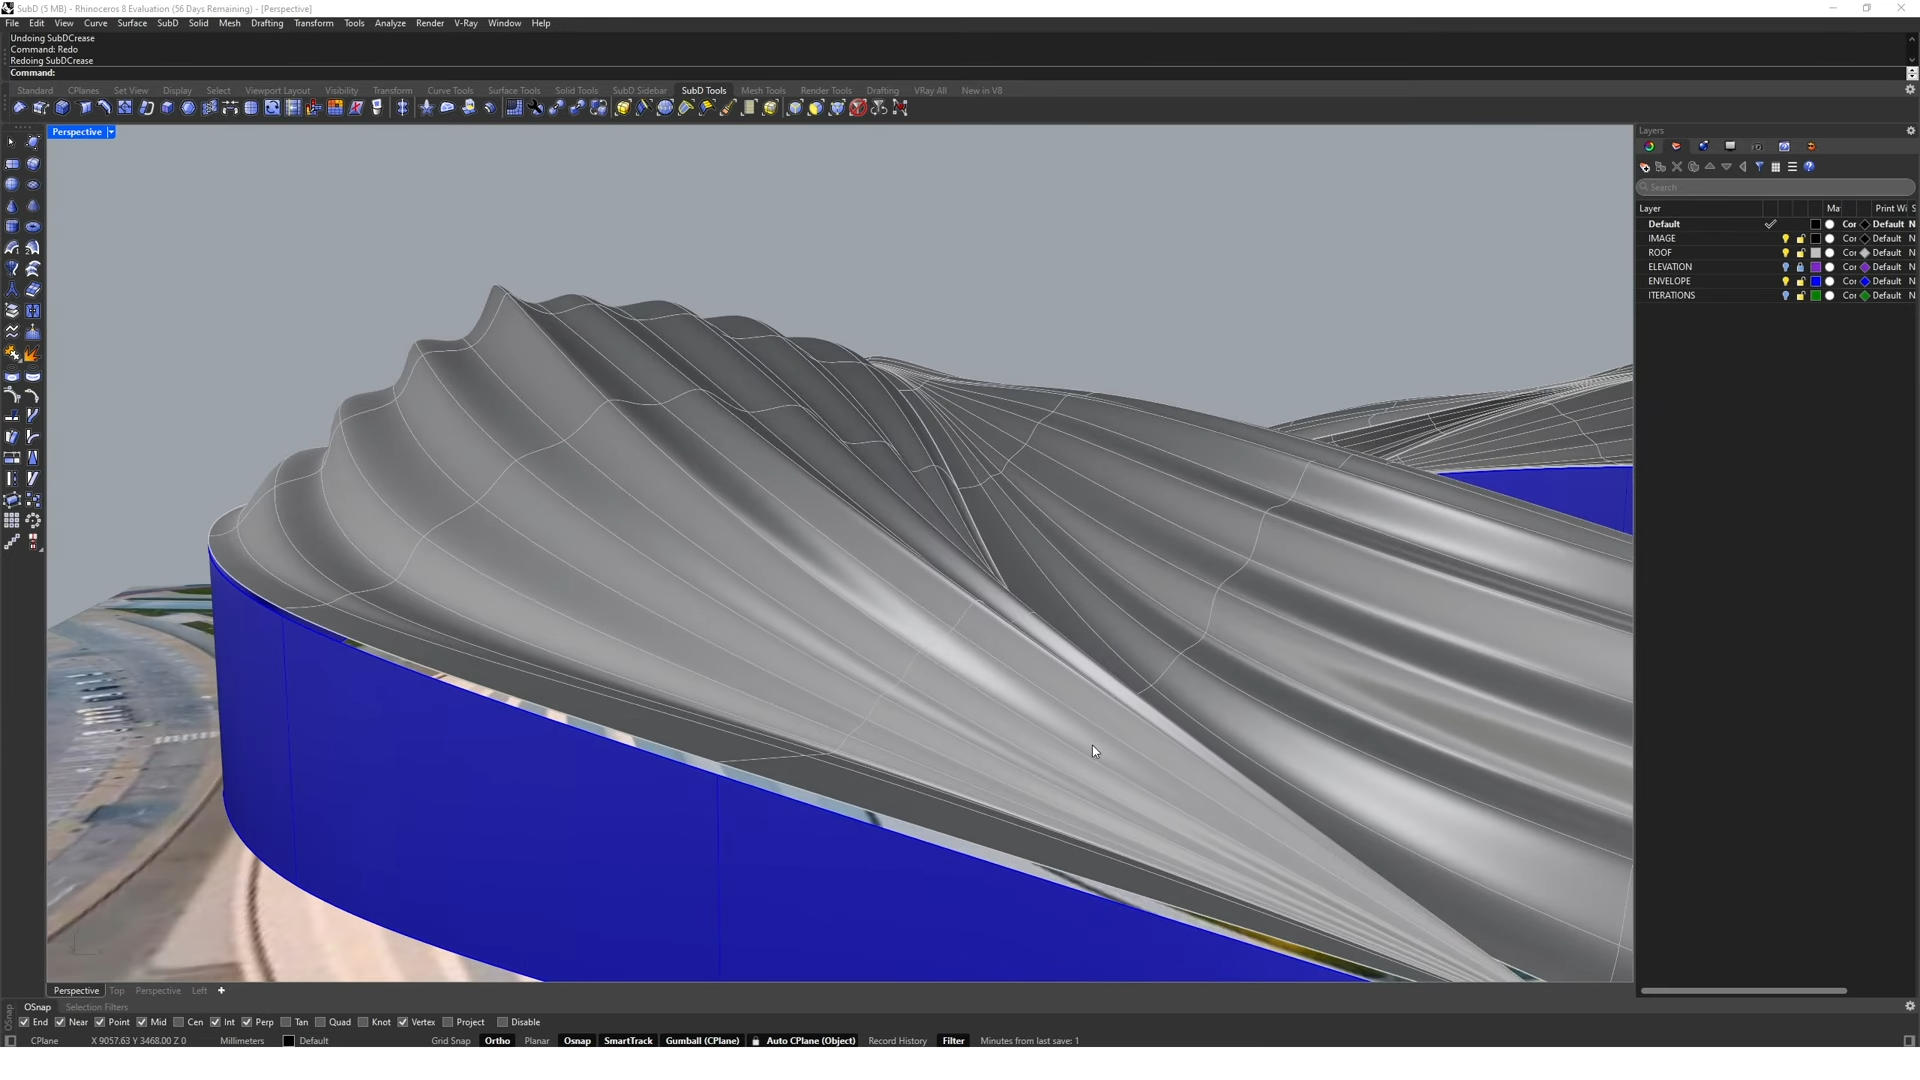
SubD Crease. ©The Different Design
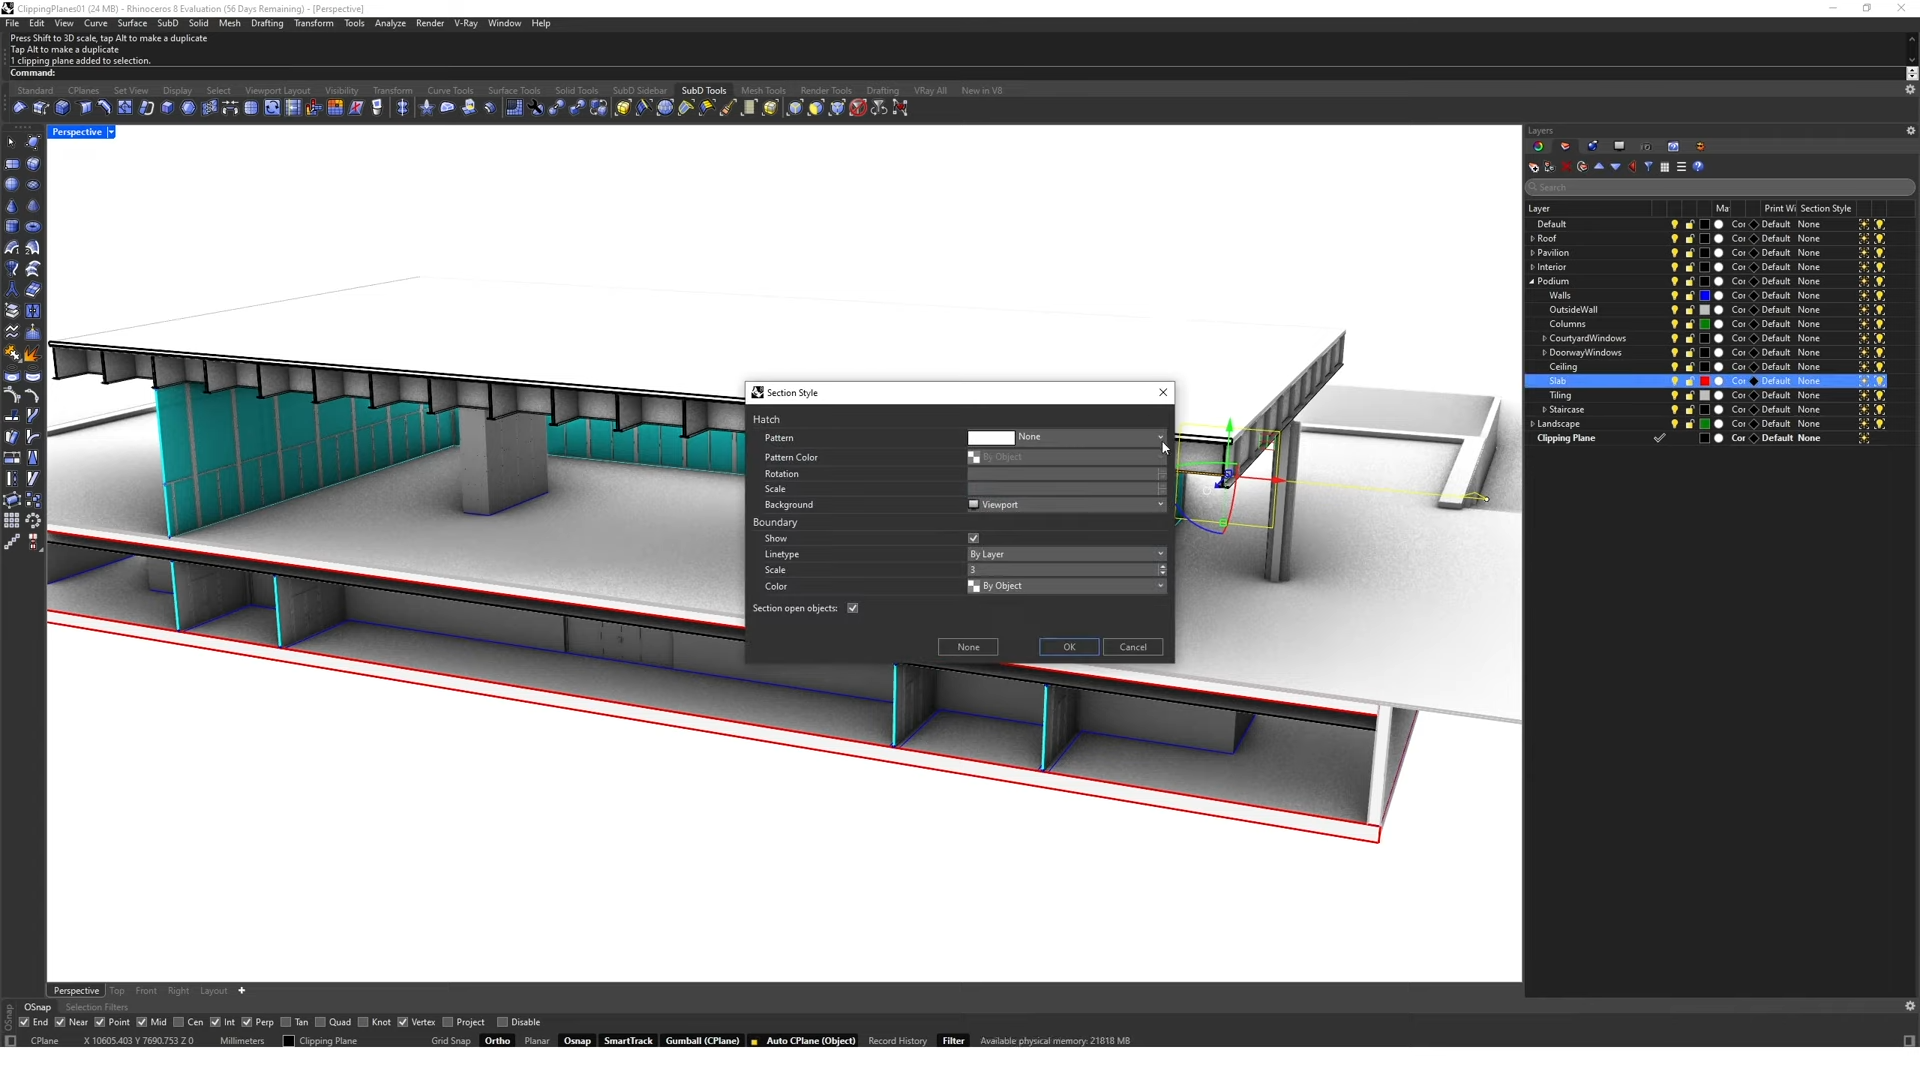
Section Style. ©The Different Design
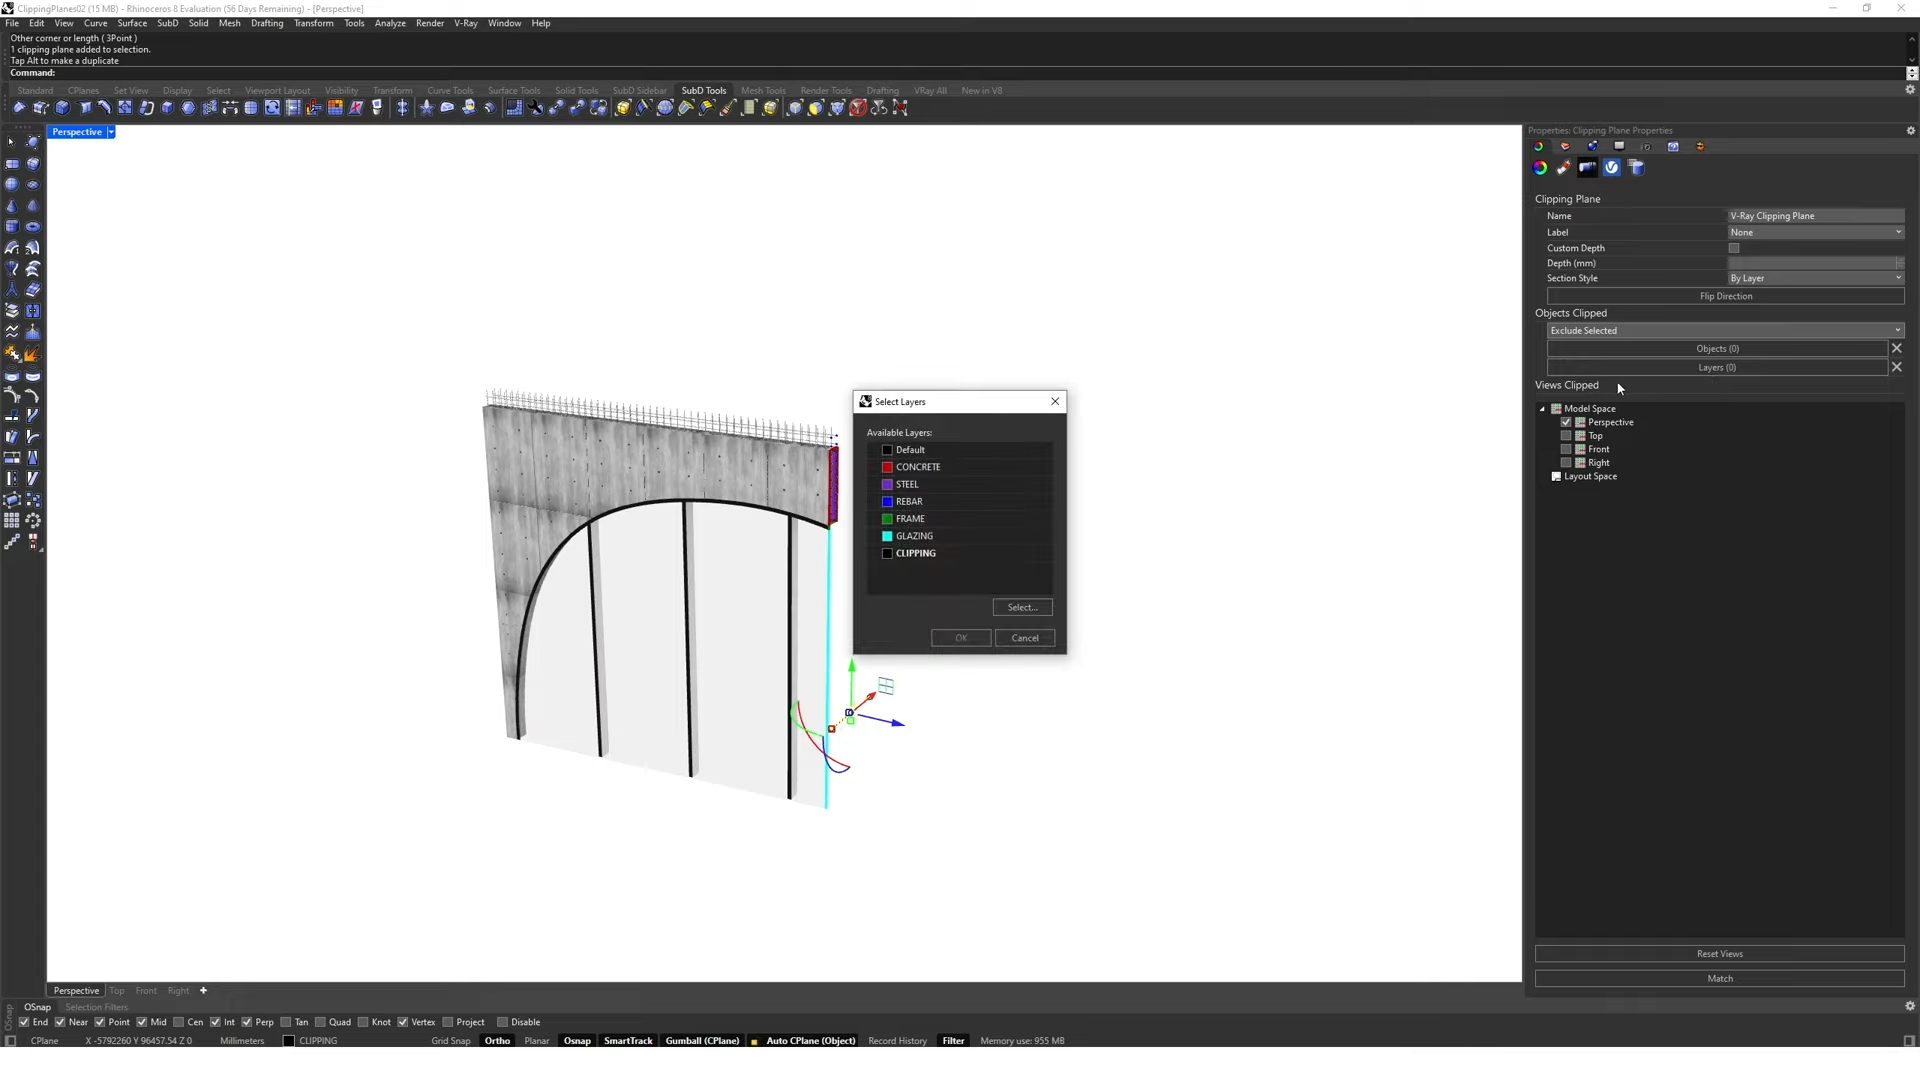
Selective Clipping. ©The Different Design
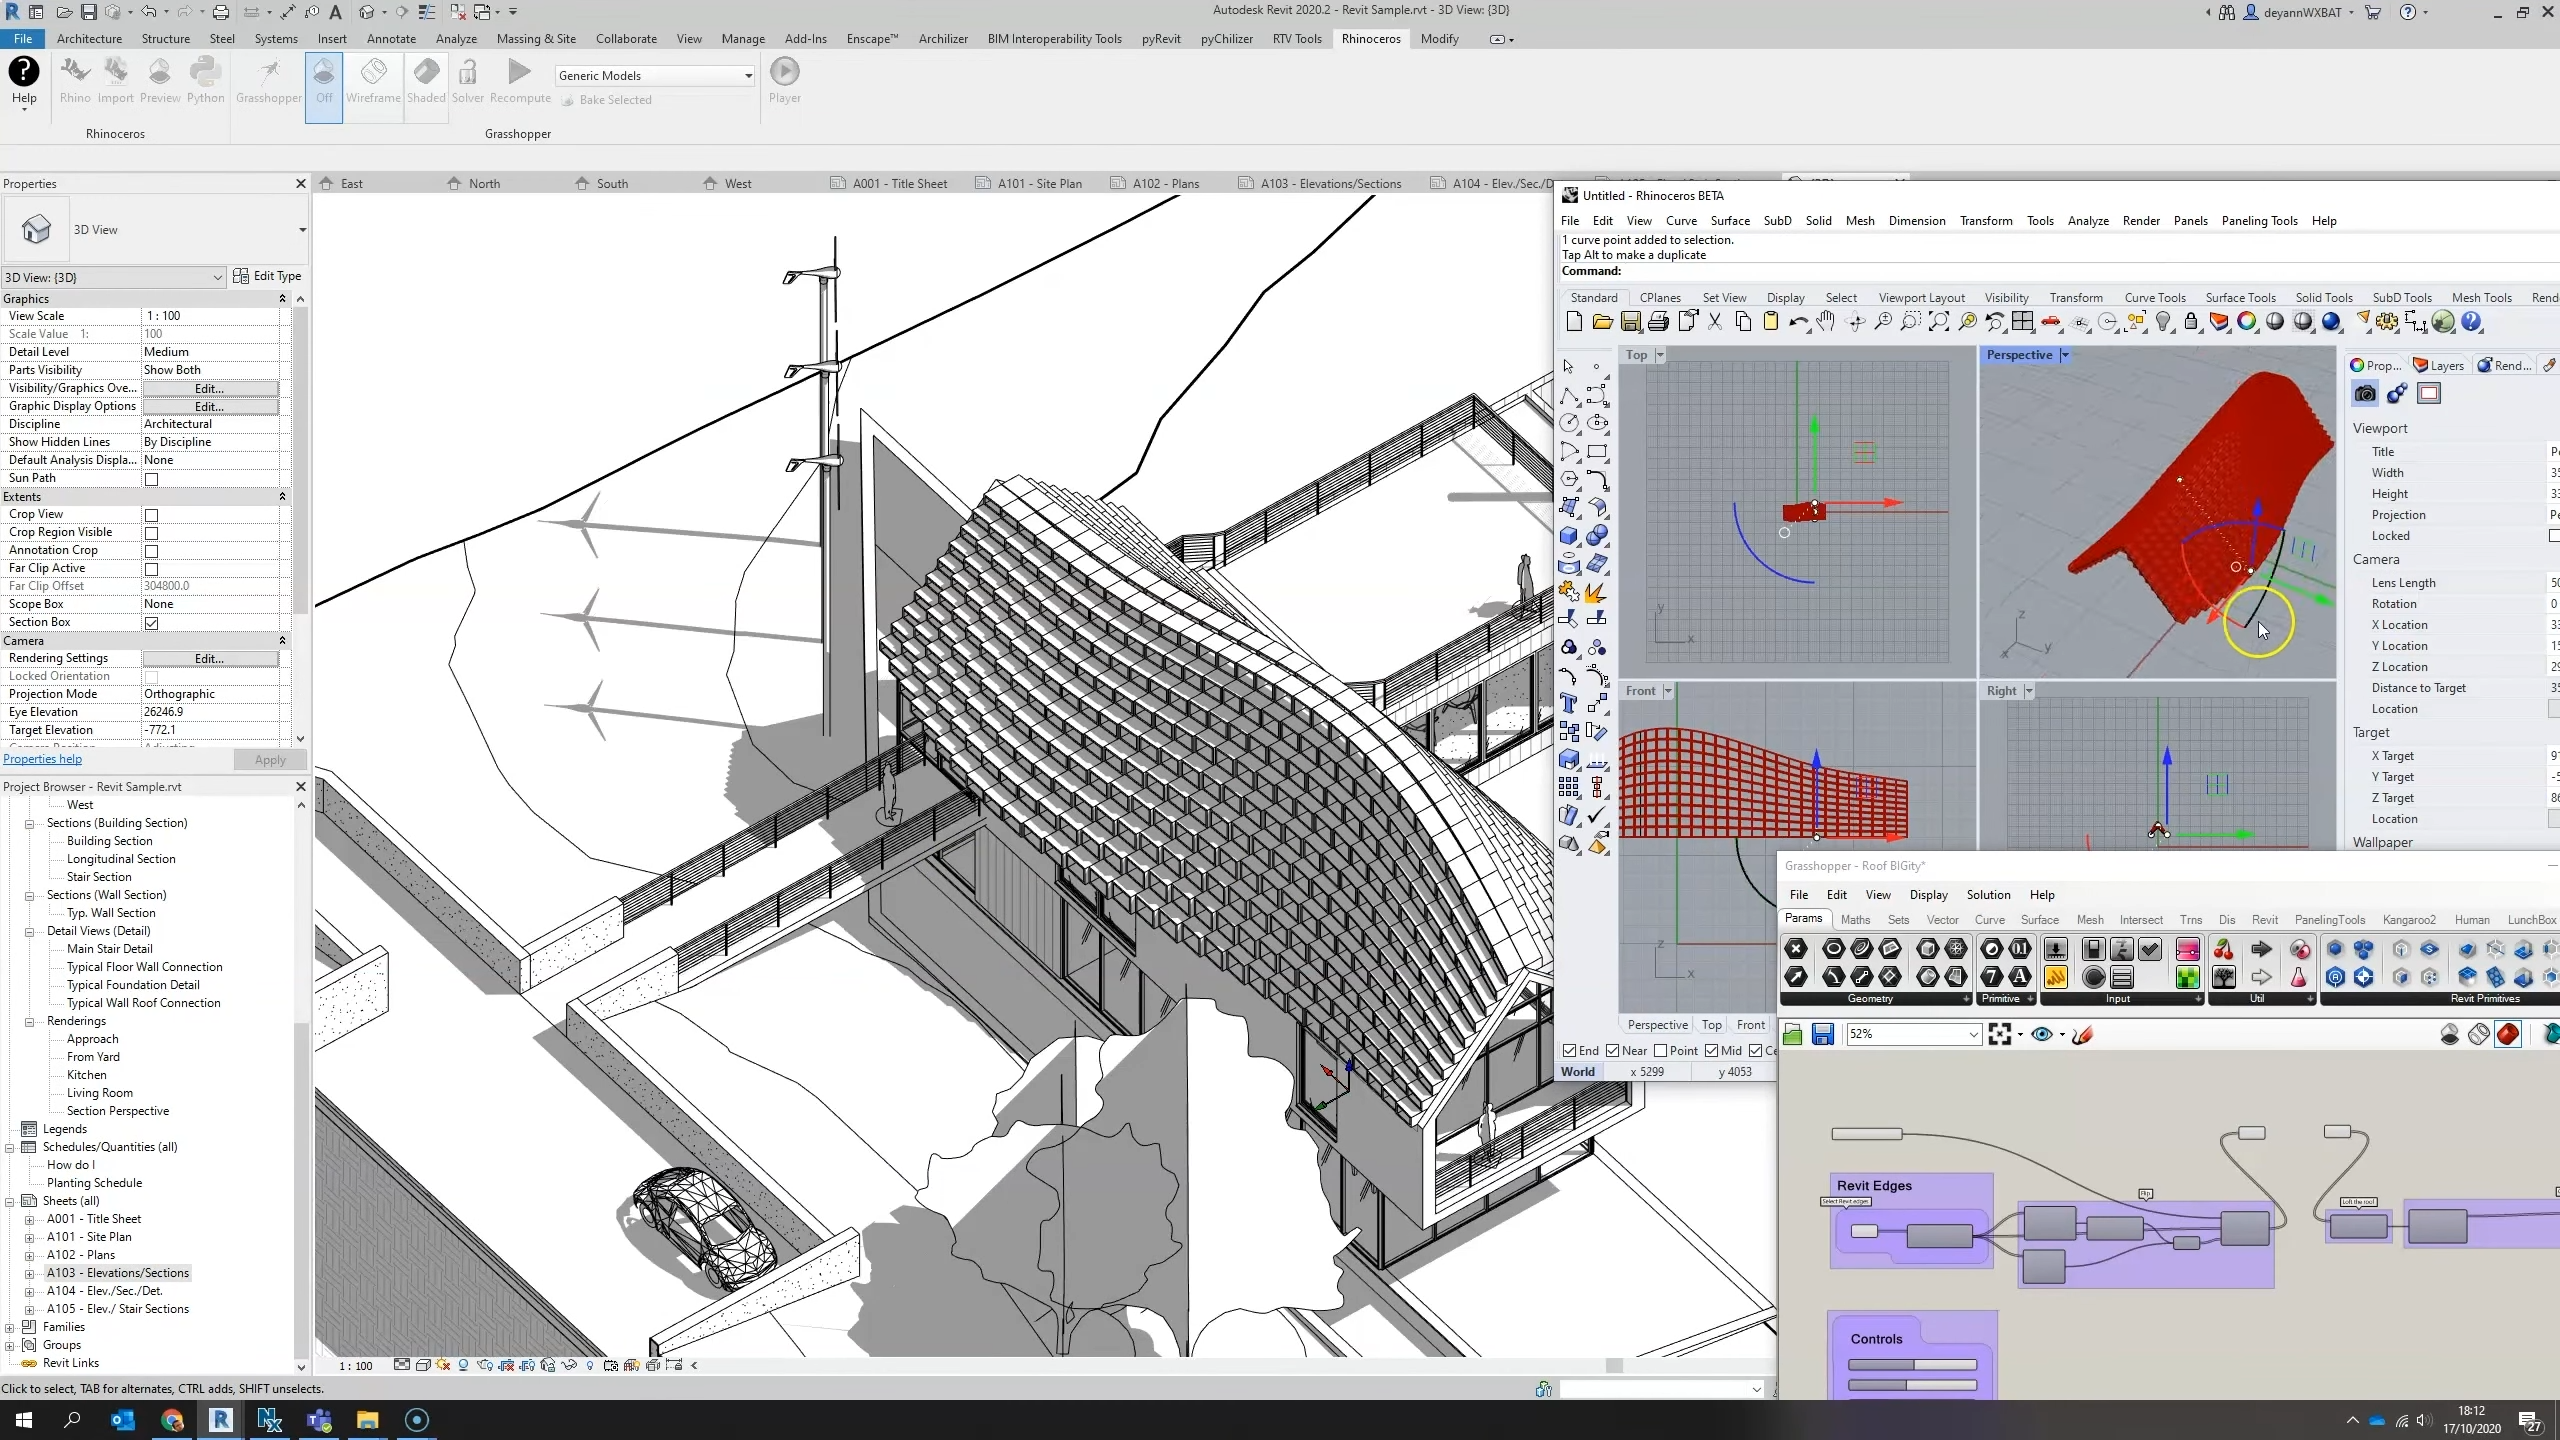
Rhino.Inside.Revit. ©Simply Rhino