- File size:
- 9 MB
- Date added:
- Dec 05, 2023 | Last update check: 1 minute ago
- Licence:
- Open-source / Free
- Runs on:
- Revit 2019 / 2020 / 2021 / 2022 / 2023 / 2024
Carbo Life Calculator for Revit is free and open-source add-in that allows you to create LCA (Embodied Carbon) calculations using Revit material quantities. This embodied carbon calculator enables you to create a calculation from a Revit project (with one click of a button), go through export settings (check your calculation and materials), and finally create a heatmap from the data (create a visualization of embodied carbon in your Revit model). It automatically finds available embodied carbon data from EPDs or various databases and map these to your design. When you install the app it will add CarboLifeCalc toolbar inside Add-ins ribbon tab. The toolbar includes three commands: New Project, Update Project, and Settings.
LCA (Life Cycle Assessment) determines the environmental impact of a building (product or service) throughout its life cycle.
EPD (Environmental Product Declaration) is an information sheet with a product’s full environmental impact during its entire lifetime. EPDs are based on Life Cycle Assessments.
Typical workflow:
-
Create a new calculation from a project. Open a 3D view in a Revit model. Click “New Project” in CarboLifeCalc toolbar under Add-ins tab. It opens Carbo Life Calculator window. Carbo Life Calculator will transport all the visible elements (or just a selection) to the calculator.
-
Overview tab: view the project’s Embodied Carbon. Carbo Life Calculator will automatically map Revit materials based on the closest match, which will result in an instant embodied carbon calculation. From here you can start optimizing the carbon footprint of the building. You can improve your embodied carbon values by updating your project information.
-
Calculation tab: view and edit the calculation. Use conversions, waste, and other factors to fine-tune the calculation results. Each similar material in Revit will be grouped in a row or group. You can review the mapped materials and add more detailed information. You can select multiple groups and change the material. Click “Change Material” to open the Material Selector. It lets you find materials with lower embodied carbon. Also you can use the Material Selector to change the material if Carbo Life Calculator maps a material from Revit to the wrong material. You can change and improve the mapping between Revit and Carbo Life Calculator to work best for your company. Advanced settings allows you to add factors such as waste or replace materials within the buildings lifespan.
The Material Editor allows you to change and improve the material database that Carbo Life Calculator uses. The material database can be shared within a company. So a change or added material will instantly be available for the whole team. Use the Material Editor to assess how your material factors are calculated, you can also re-name your materials closer to your Revit materials, this allows future exports to run smoother.
-
Compare Projects tab: compare various design options (optional).
-
Export and visualize results in Revit. Export simple reports to present a quick overview of the numbers, or export the entire project database to Excel (e.g. to make your own graphs and tables). Carbo Life Calculator can also export the embodied carbon values back into Revit and create heatmaps to visualize the location of the embodied carbon. Save the work, and Revit will create a heatmap and import the data. In Revit, the colors indicate the intensity of the embodied carbon. An element in Revit will now also contain the parameter “Embodied Carbon” and it’s value in kg, so you can use it in schedules.
You can use heatmap function in Carbo Life Calculator to create three different visualizations in Revit using the calculated embodied carbon. Choose a heatmap type (By Material, By Group, By Element) and click Accept. Closing the app will create the overrides in Revit. Heatmap based on CO2 density: red elements are high in CO2e/kg; green elements are low in CO2e/kg. Heatmap based on total CO2 value of a group and Heatmap based on total CO2 value of an element: red elements have a high embodied carbon; green elements have a low embodied carbon.
Similar software
- Tally for Revit – Conduct whole-building LCA during design, compare design options and select building materials based on its environmental impact.
About David Veld
David Veld is an independent developer of Revit add-ins. He is senior Revit Technician at Elliott Wood Partnership Ltd., a London-based structural and civil engineering practice.
Gallery
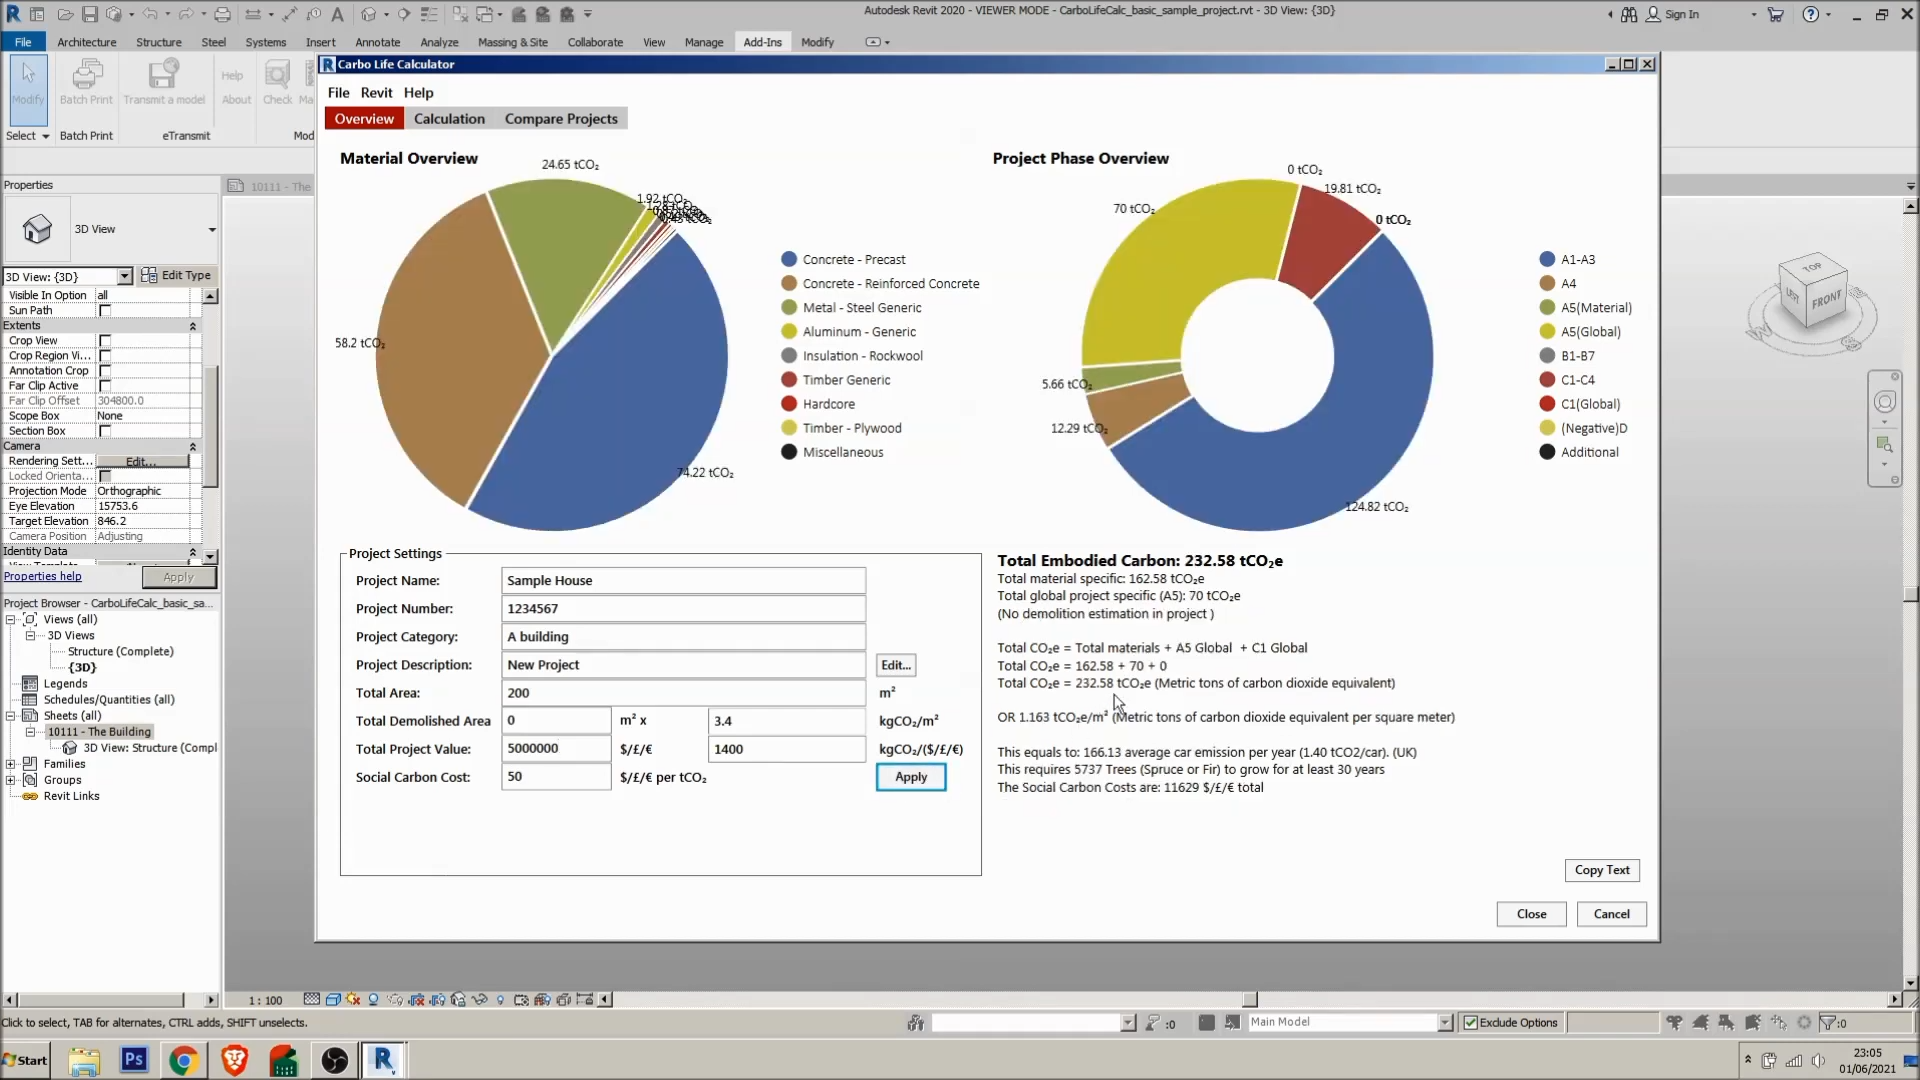
Carbo Life Calculator window: Overview tab. ©David Veld
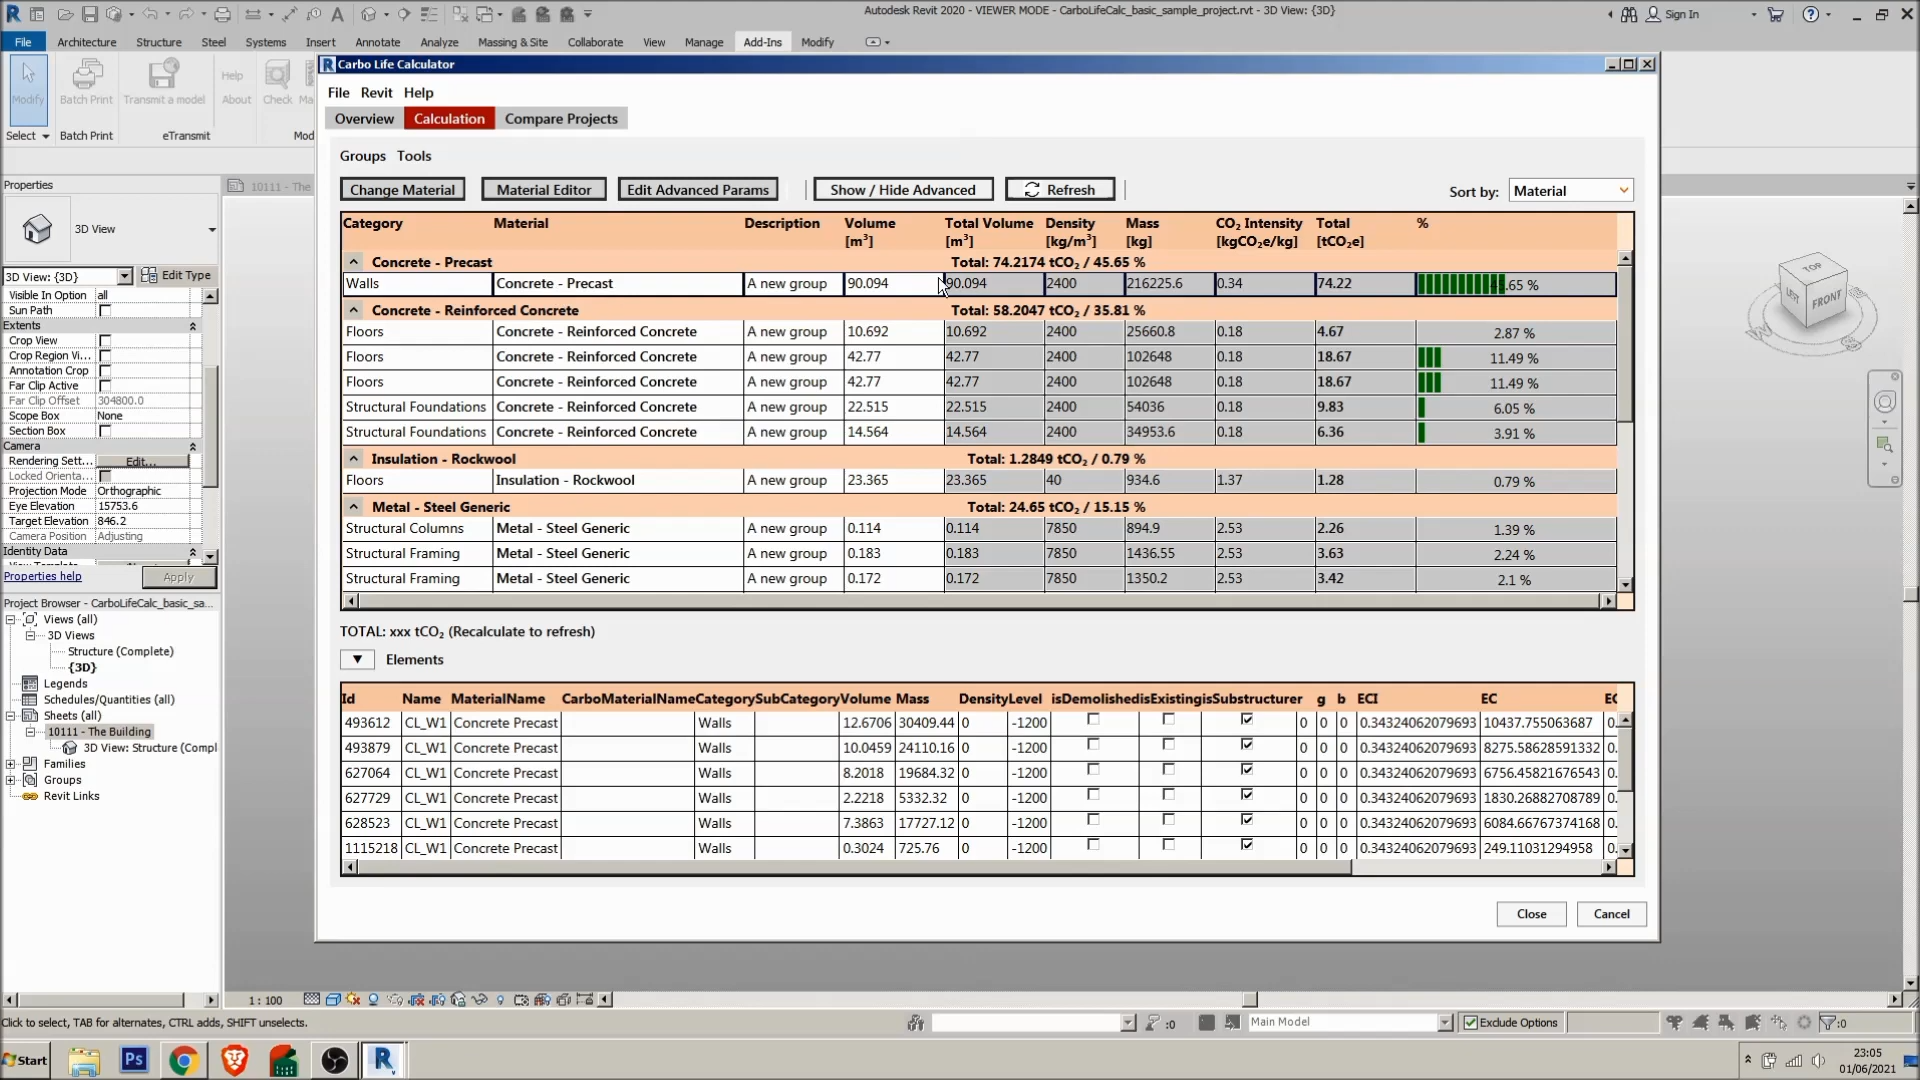
Carbo Life Calculator window: Calculation tab. ©David Veld

Material Selector. ©David Veld
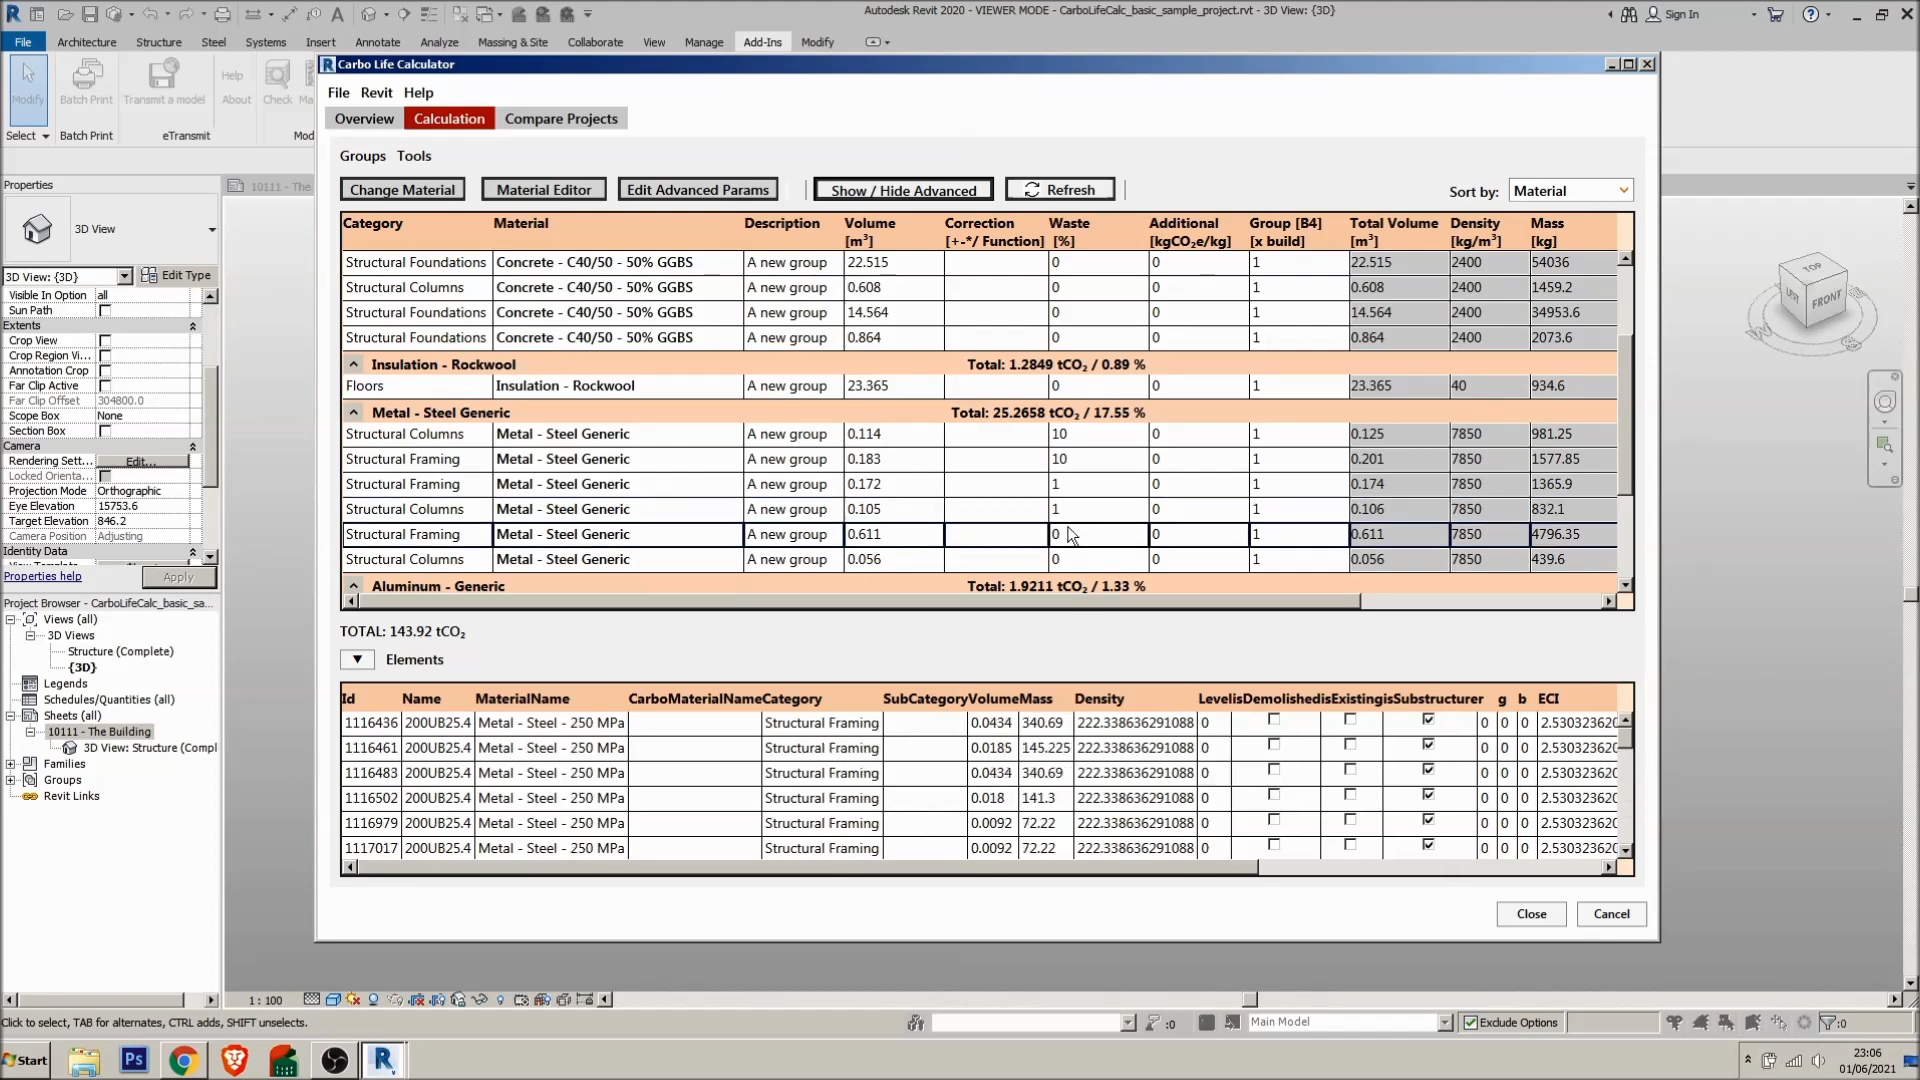
Show Advanced settings with additional factors (e.g. Waste). ©David Veld
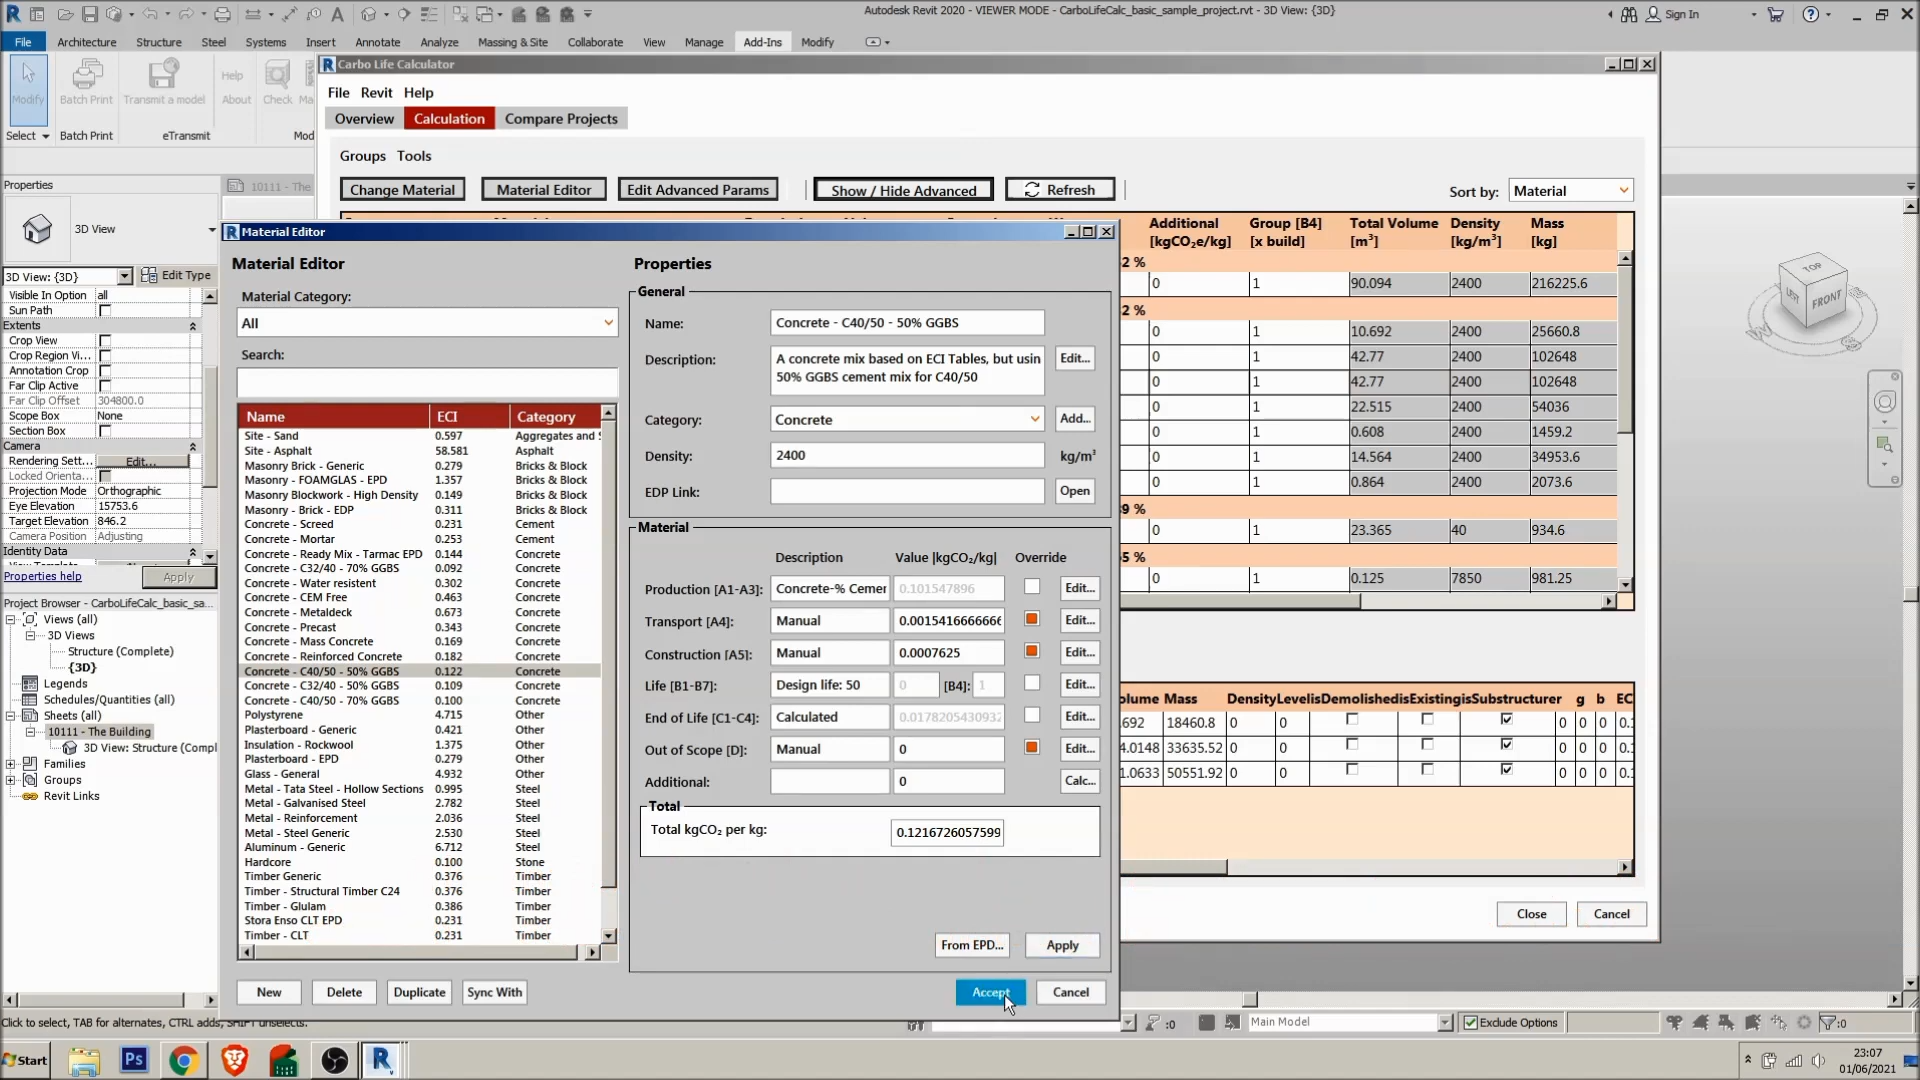
Material Editor. ©David Veld
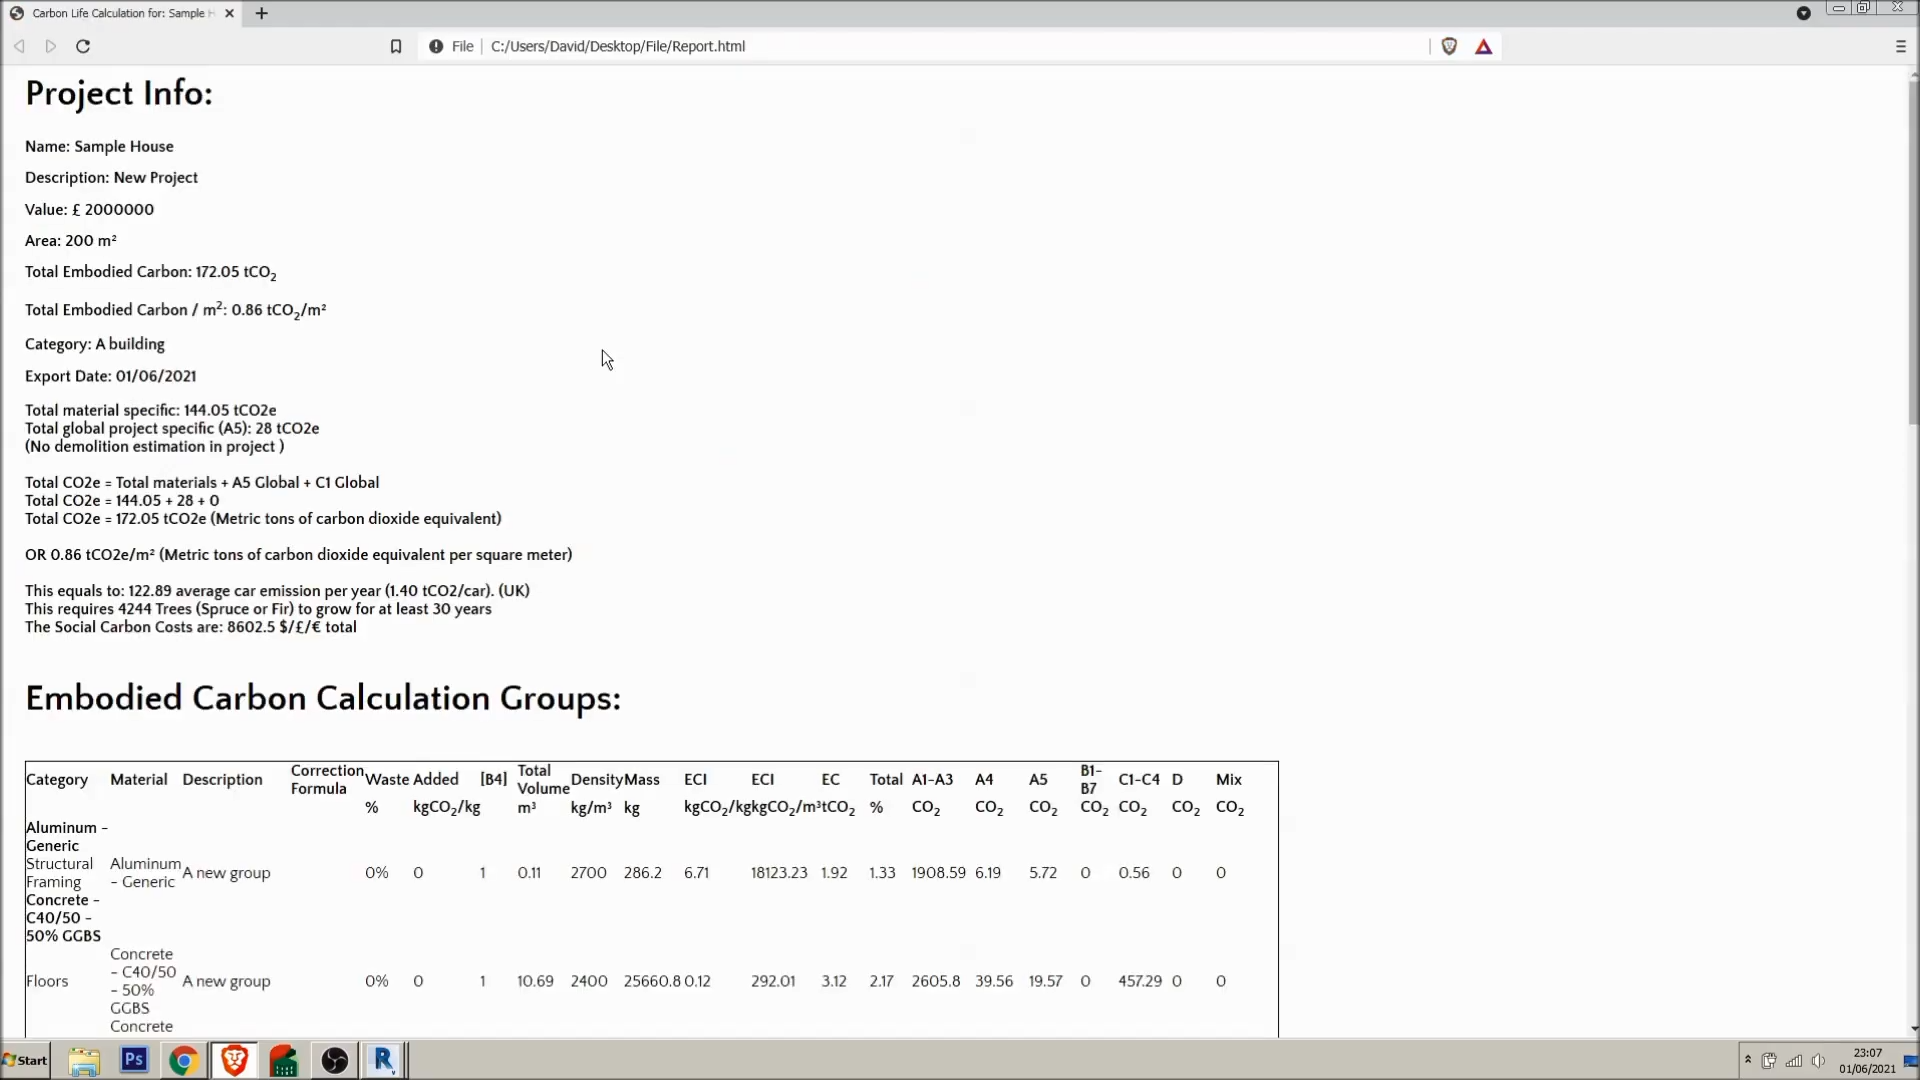
HTML report. ©David Veld
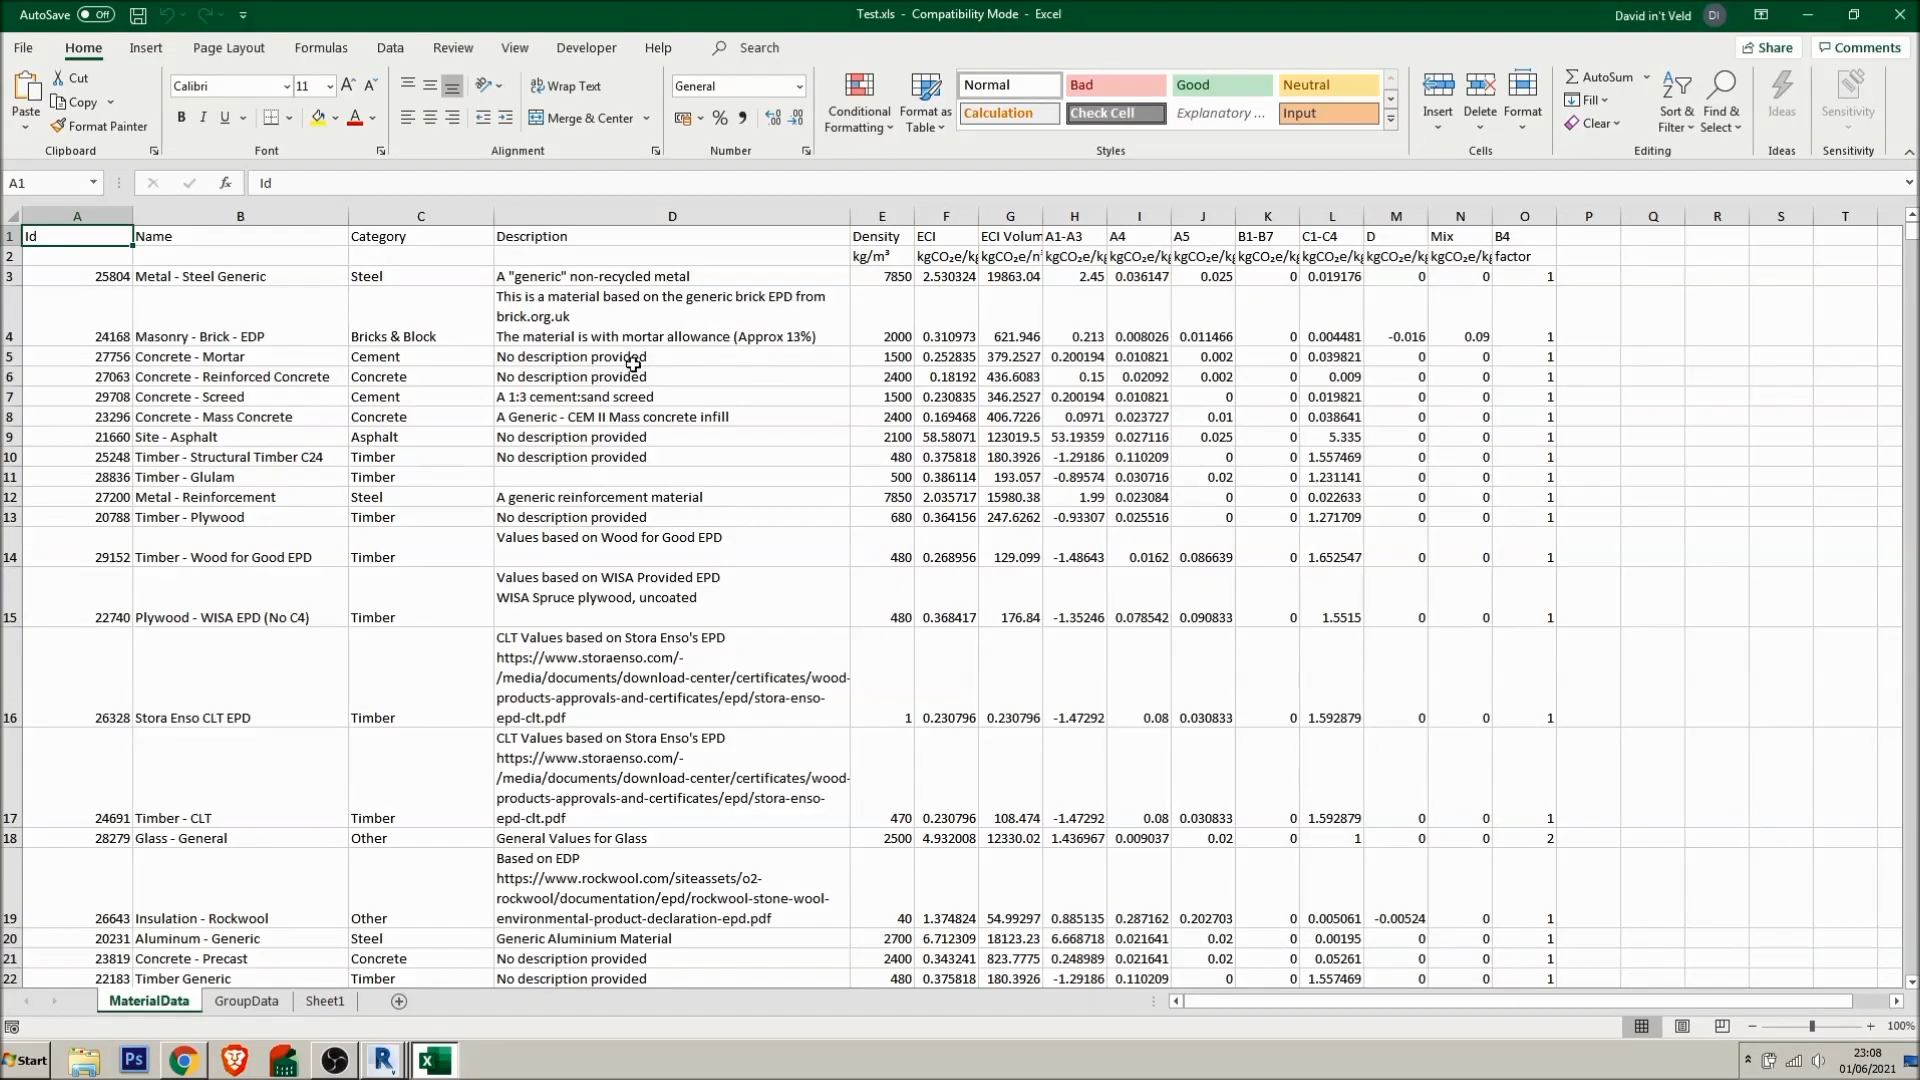
Excel report. ©David Veld
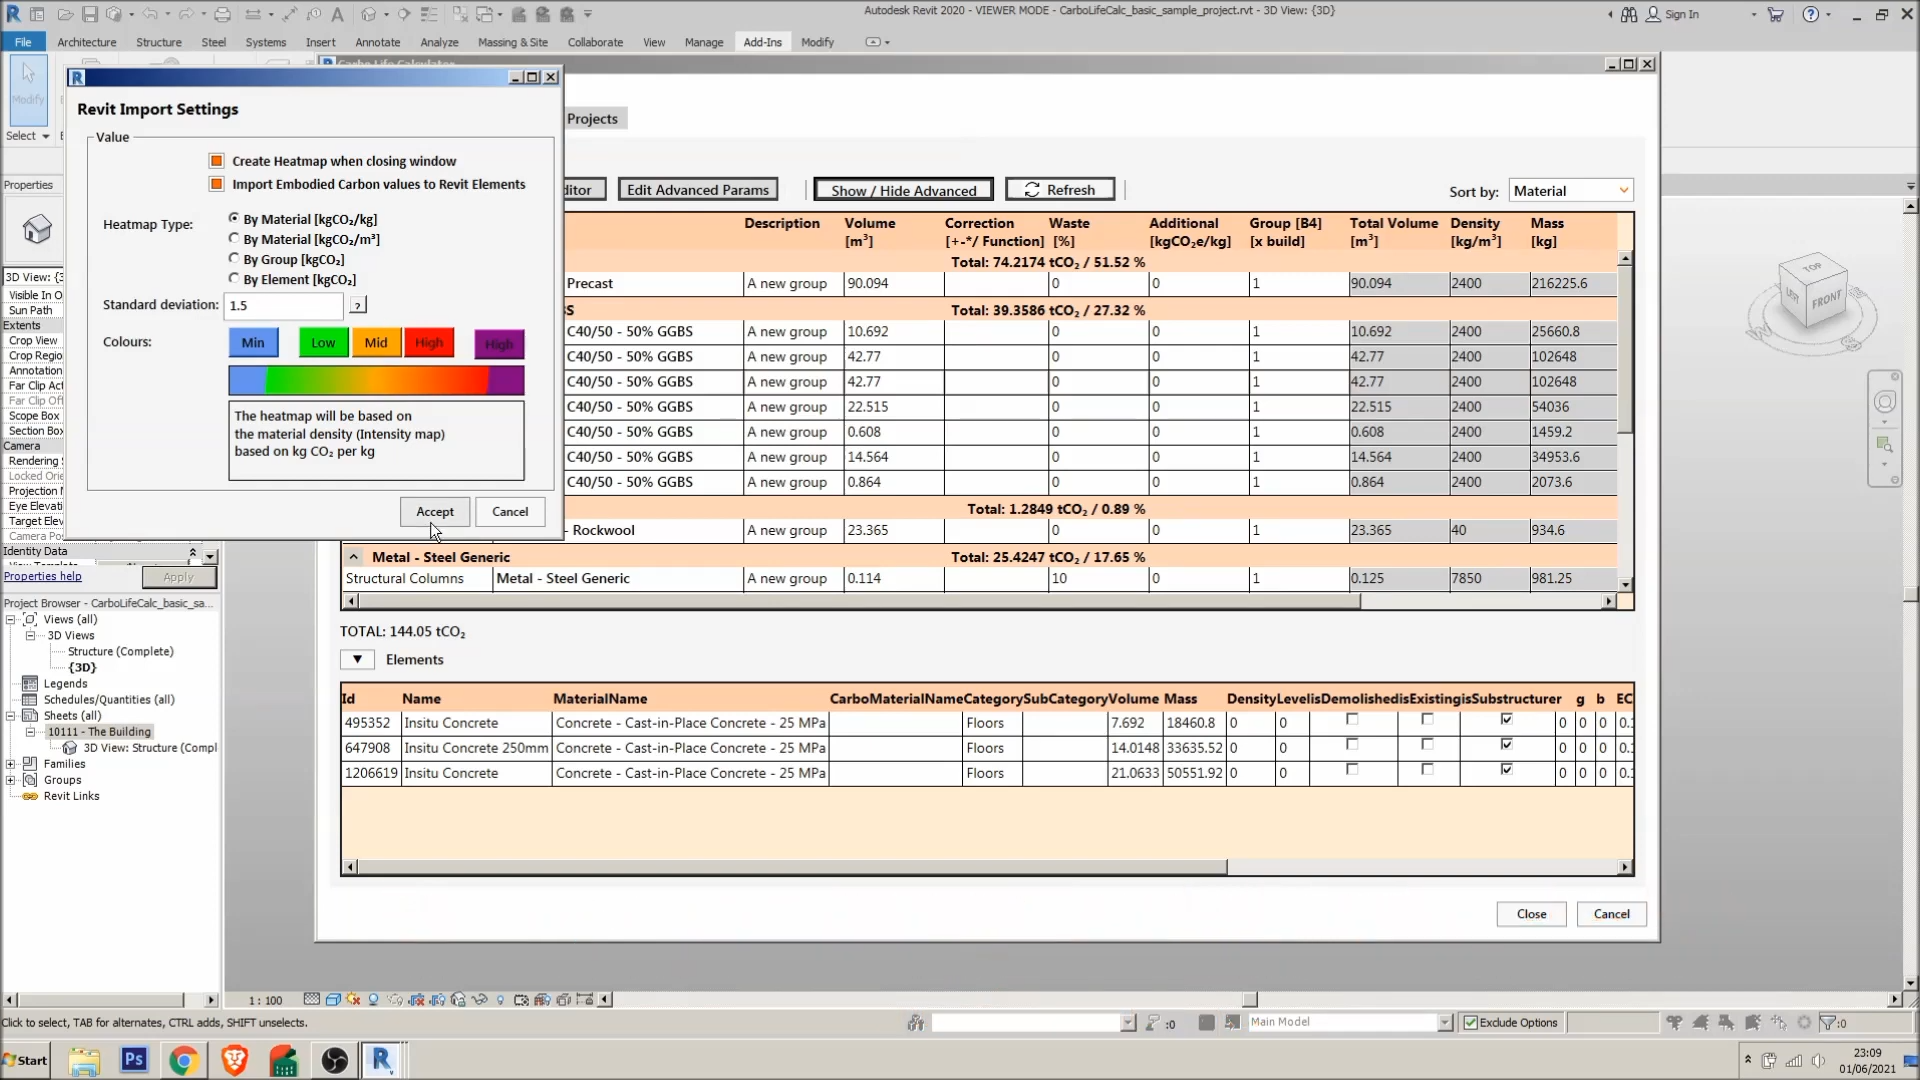
Revit import settings. When you’re satisfied with calculation values you can create heatmaps in Revit. ©David Veld
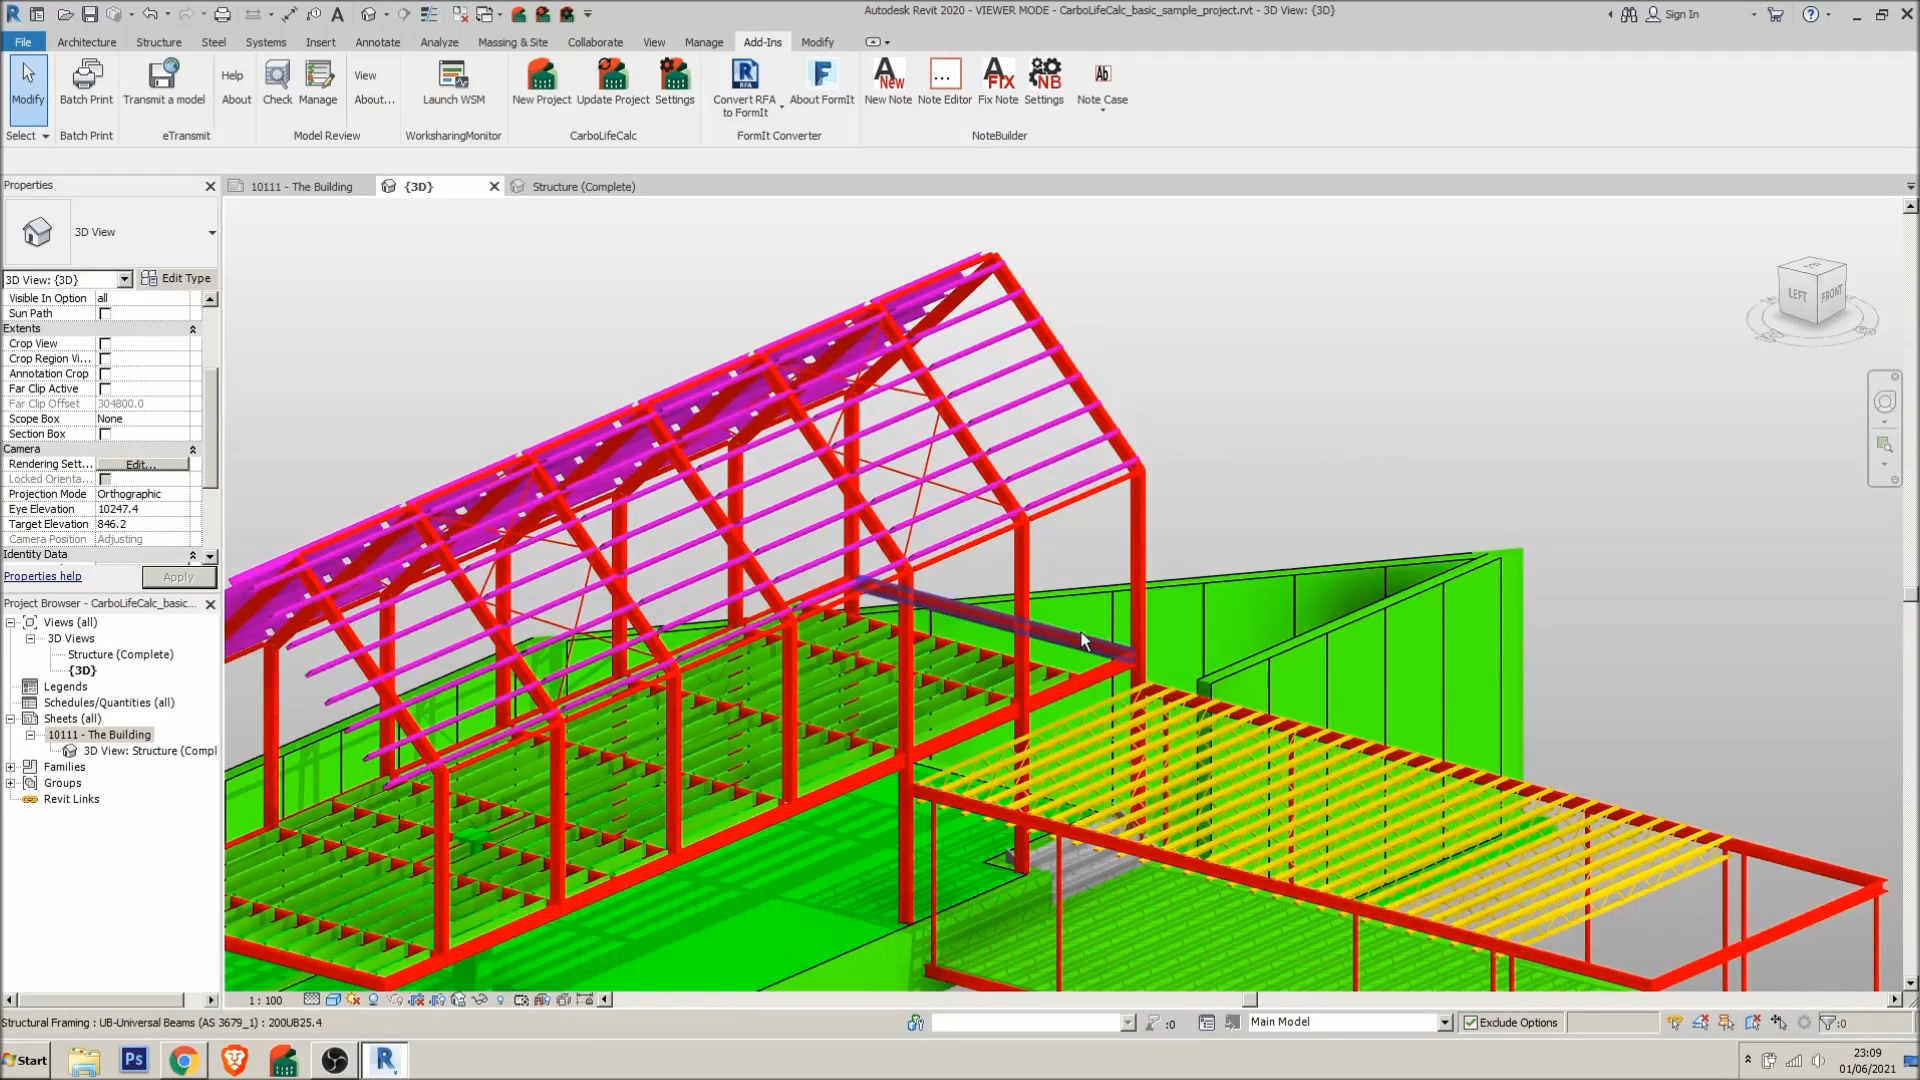
Visualization in Revit. ©David Veld
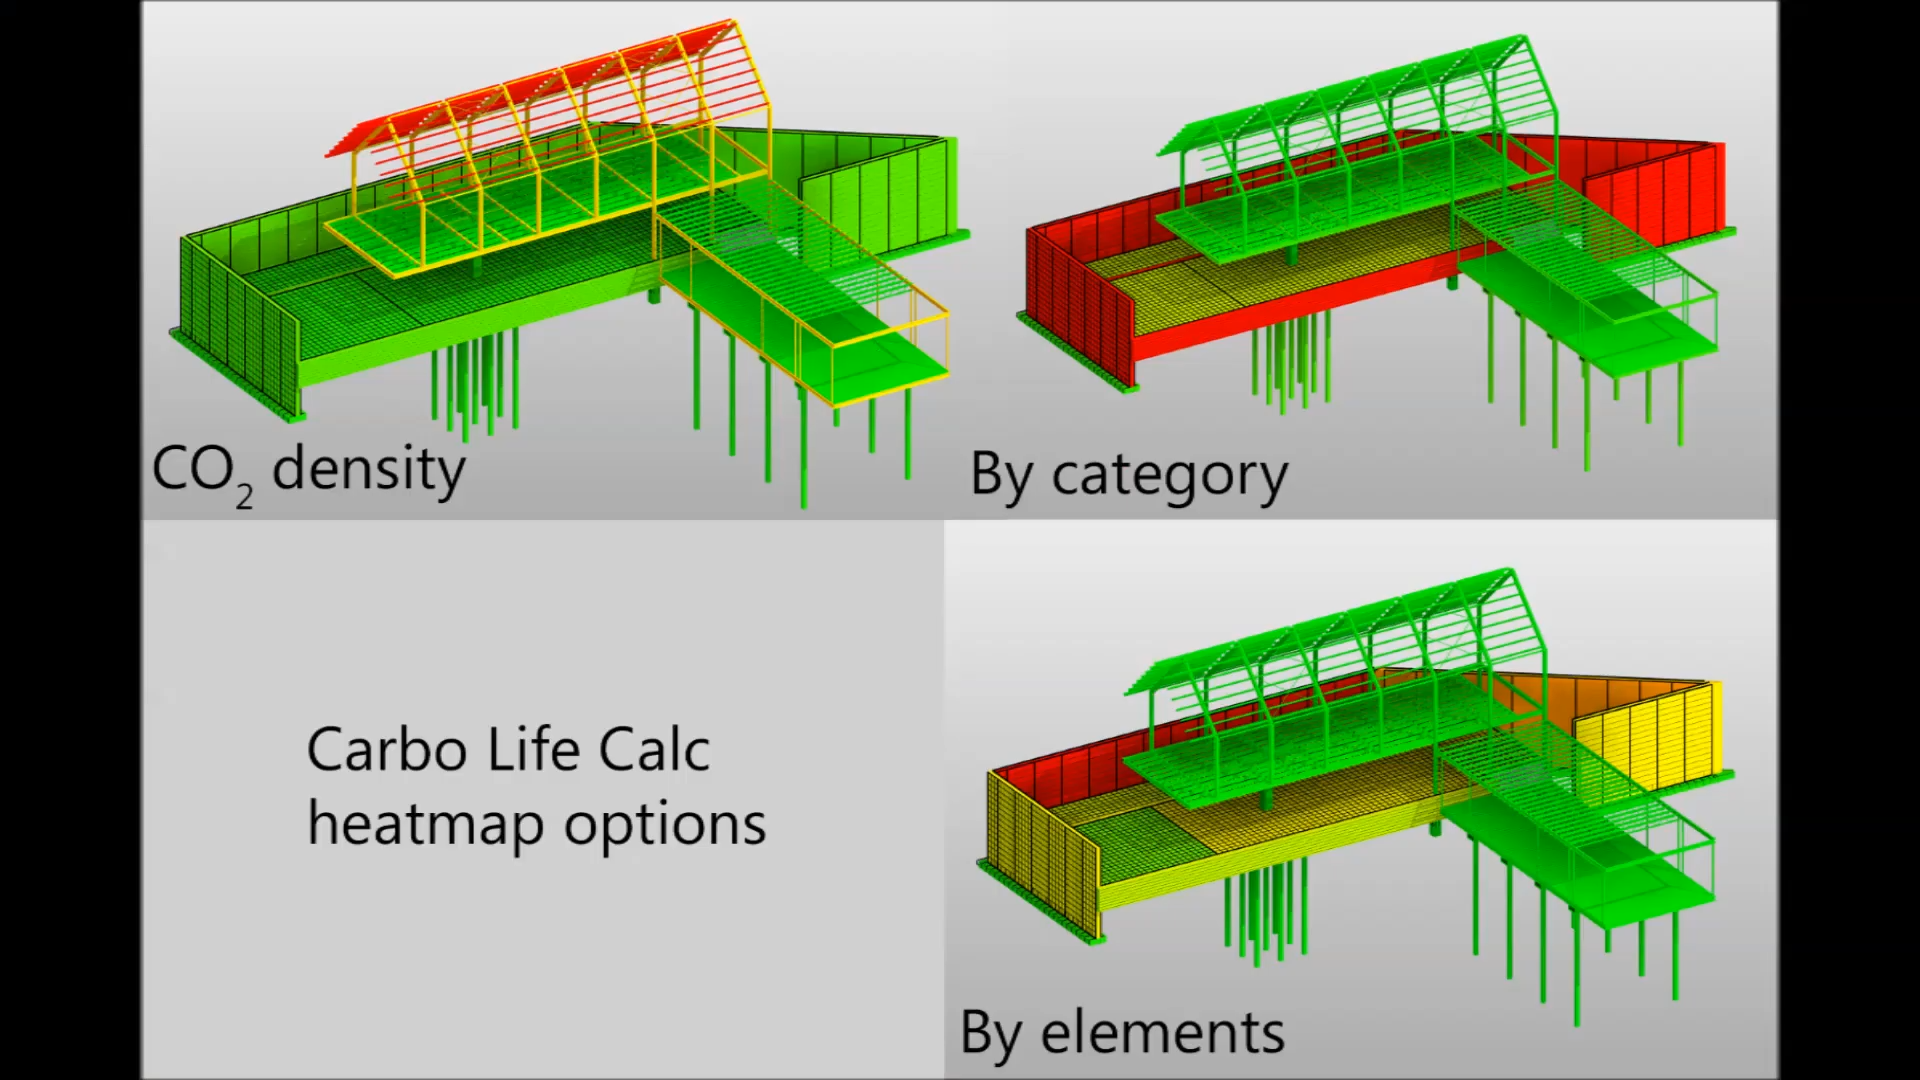
You can choose between three heatmap options. ©David Veld