- File size:
- 1.1 MB
- Date added:
- Aug 27, 2022 | Last update check: 1 minute ago
- Licence:
- Free
- Runs on:
- Rhino 5 / 6 / 7
PanelingTools for Rhino and Grasshopper is a plugin for architectural and other designers to create paneling patterns for conceptual and detailed design. It helps you to translate complex geometry into something that is suitable for analysis and fabrication. Create a NURBS surface or mesh geometry in Rhino, and then use PanelingTools to create paneling patterns using the UV directions of the surface. The workflow is a two-step process: create a rectangular grid, then create the panels. PanelingTools uses standard Rhino geometry, and it extends Grasshopper for parametric modeling.
Grids in Rhino are points that have a UV index indicating U and V locations of each point within the grid. Each four neighboring points create one cell. Grids have two directions, the U and V direction.
PanelingTools is in development since 2008. It has been developed by Rajaa Issa from the McNeel (the creators of Rhino).
Typical workflow:
- Download and install the PanelingTools. In Rhino, you will see the new menu “Paneling Tools”.
- Create a surface in Rhino. You can use any NURBS surface for paneling.
- Create a grid. The first step is to produce a grid. Use “Create Paneling Grid” tools (Paneling Tools -> Create Paneling Grid). You can make different grids: array, array polar, extrude along one or two curves, sort points, surface, etc. When you have a base surface, the best option to create a grid is to use Surface set of tools in Paneling Tools. You can use “Surface Domain Number” tool, and define how many number of grids you need in the U direction and how many points you need in the V direction. Use “Surface 3D distance” tools if you want to have panels which are based on a distance. Choose “Surface Domain Number” tool, select surface to divide by number, and press Enter. You will see grid of points, and you can set the number of spans in U and V direction. Press Enter. The points will appear on the surface.
- Create panels. The second step is to create panels from grid. Use “Paneling from Grid” tools (Paneling Tools -> Paneling from Grid). There are Panel 2D and 3D Grid tools. If you select “Panel 2D Grid” tool, you will have to select a paneling points grids, and press Enter. Then select the base surface for paneling and you will see a set of panels on the surface. The most important option among paneling options is “Pattern”. You can set it to box, boxX, triangular, triBasic, dense, diamond, angleBox, wave, or brick. The second option “PanelShape” is set to straight by default, which means that you have straight lines (not curves) for edges of the panels. The other options enables you to choose if you need edges, faces border, faces, flat faces, and mesh. Once the paneling geometry is generated, you can use Rhino commands to add thickness or extrude to create a 3D geometry. For example, you can use the “MultiPipe” command to generate the final geometry.
Gallery
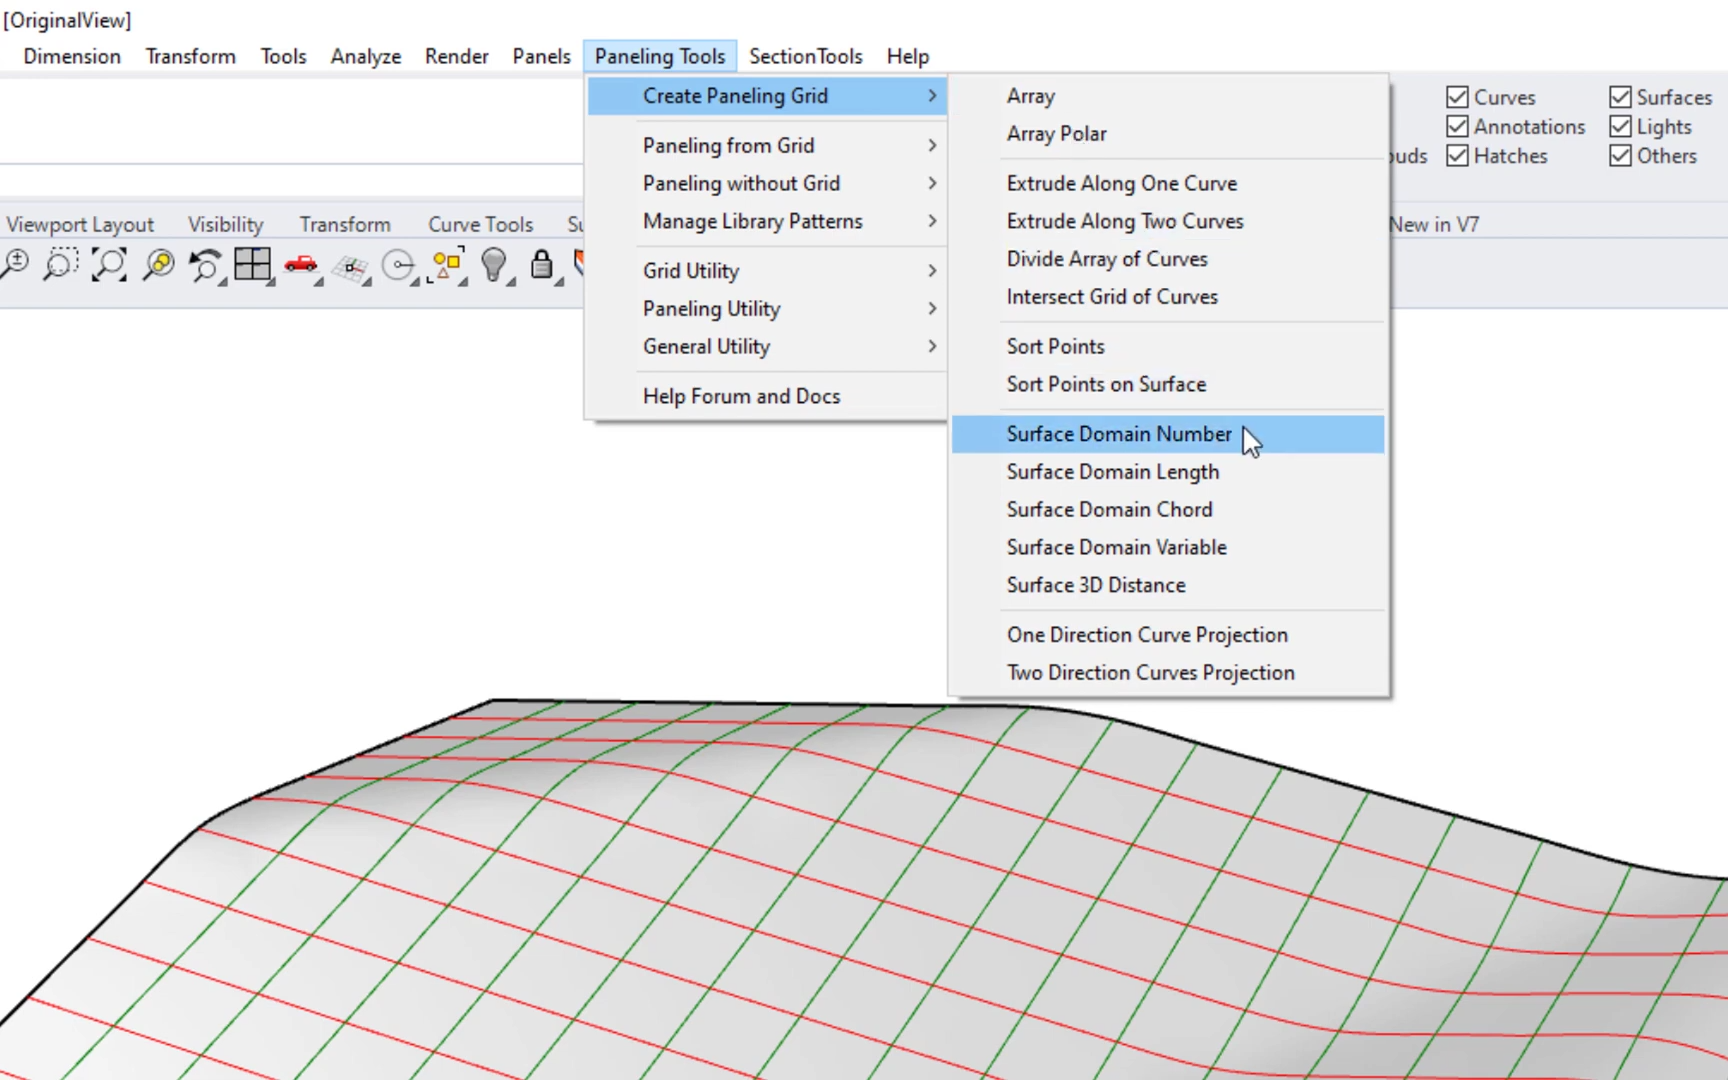
Paneling Tools menu in Rhino: Create Paneling Grid tools. ©Rajaa Issa
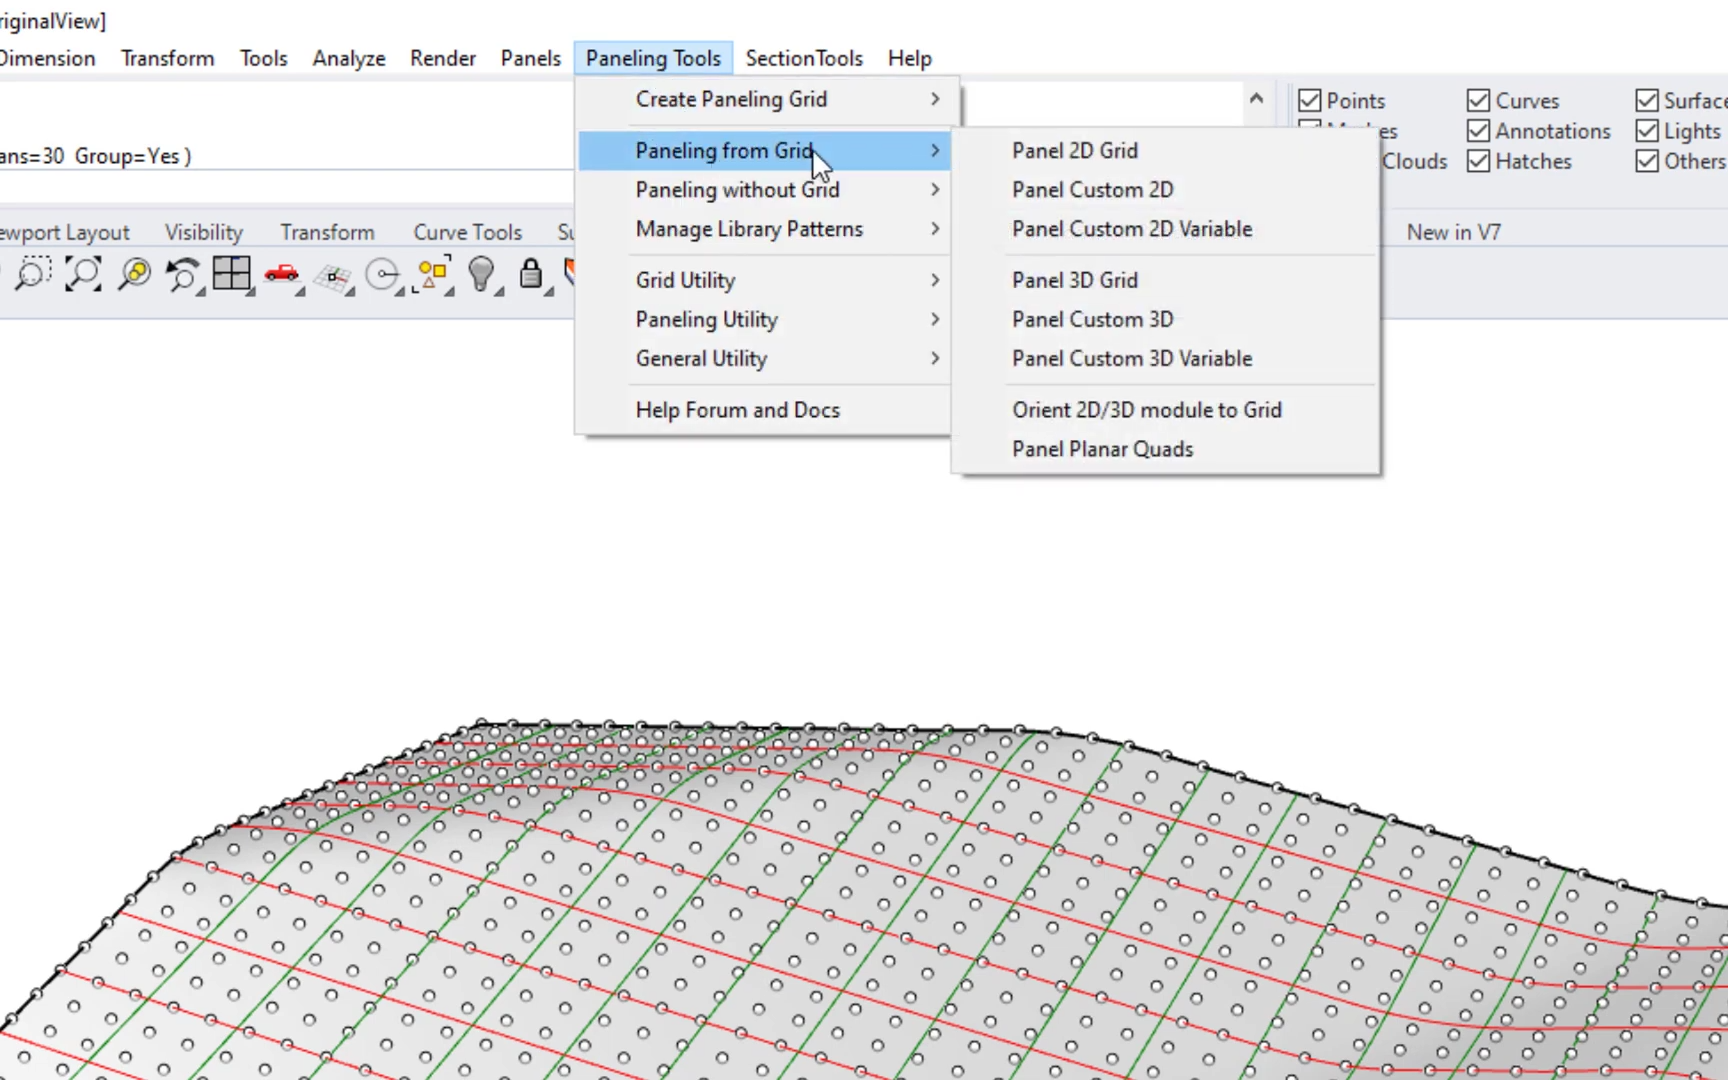
Paneling Tools menu in Rhino: Paneling from Grid tools. ©Rajaa Issa
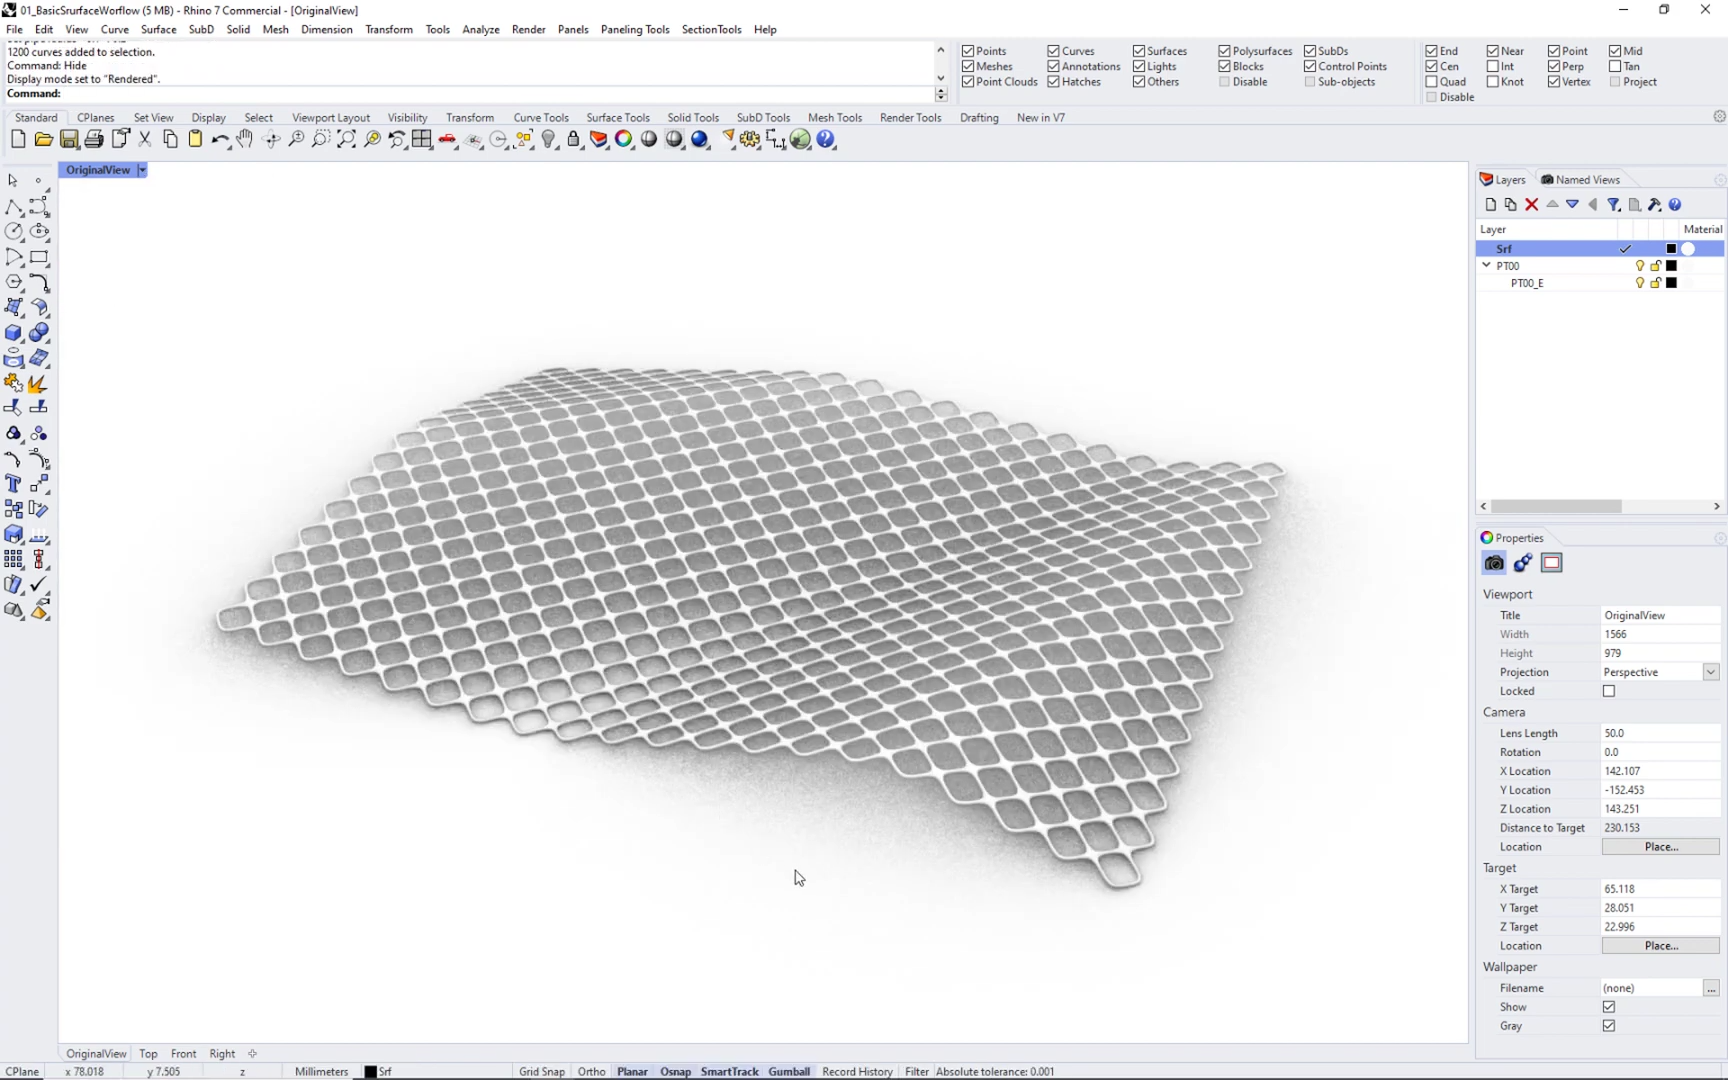
The final output. ©Rajaa Issa